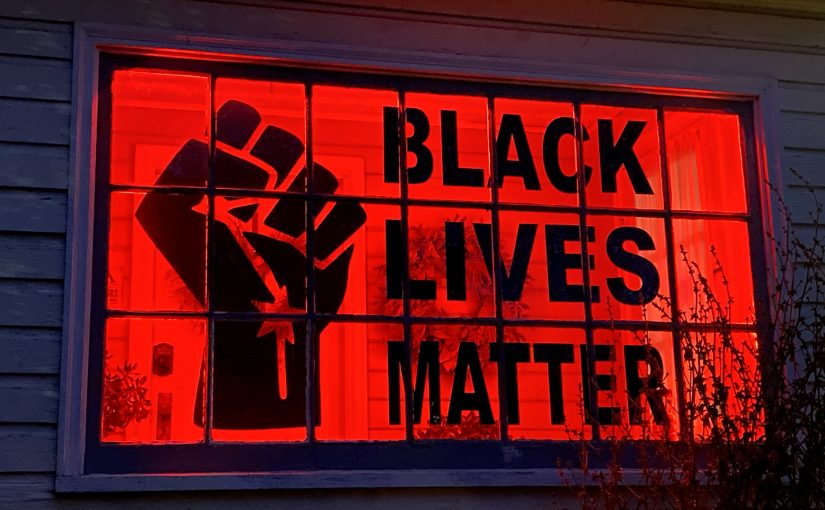
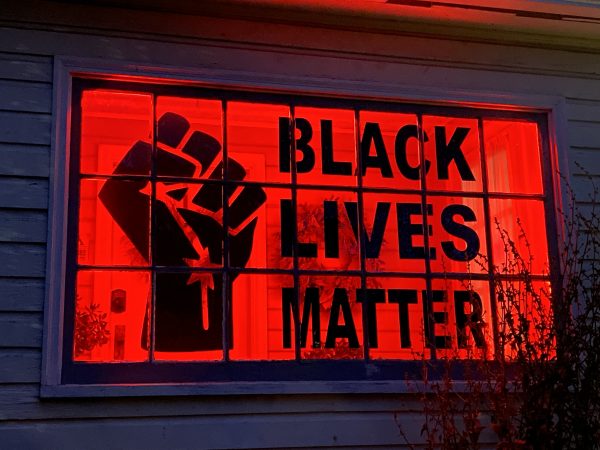
For various reasons, I’m not able to go out to the Black Lives Matter protests during COVID, but I’m trying to do my best from home. This includes political activism, contributing to a local bail fund, helping with social media protest video tech stacks, and now showing community support with a multi-segment vinyl window sticker in the porch window. That last one is perhaps not the most practical or functional, but it brings me joy, with the hope that it does the same for the neighborhood.
I’d love to share the files with you so you can make your own, but given that our windows very likely differ, then that course of action isn’t going to be very helpful, so I figured I’d share my methodology. Feel free to follow along at home, tweaking for your situation.
First, let’s start with equipment and materials. You’re going to need:
- A vinyl cutter. I have a Cricut Maker with a 12 inch × 24 inch cutting mat. This works for the size of my window panes. You can get away with a smaller one if you want to further slice up your design.
- Adhesive vinyl. A lot of it. Unless you get really creative with saving material, you’ll need roughly enough to cover your whole design at a the size of your window — both the positive-space and negative-space. In my case, that was going to be about 17 feet of the 12″-width stuff (though I did a bit of creative work to cut that back).
- Clear vinyl transfer paper. This is the adhesive stuff you use to transfer your design from its paper backing onto the window. You can kind of re-use this if you’re really careful, but you’ll also need, at most, enough to transfer your design to the window.
- Vector software. I prefer Affinity Designer, since it’s a one-time purchase. If you have a subscription to the Adobe tools, then Illustrator is the go-to app for most folks. Inkscape is a free alternative, but its macOS port is terrible.
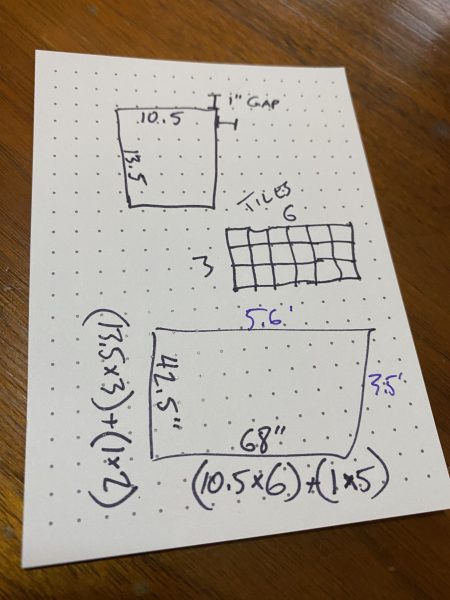
I started by measuring the overall window size, the pane dimensions, and the size of the gaps between panes. That’ll define your overall workspace. 6×3 panes, each 10.5″ × 13.5″, and with 1″ horizontal and vertical strips between.
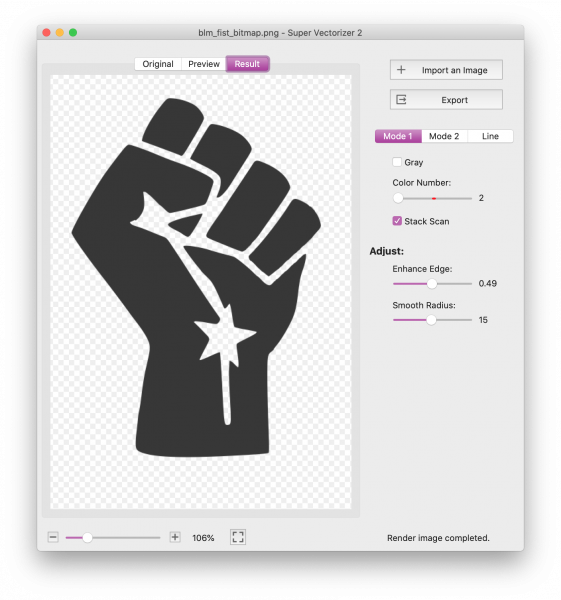
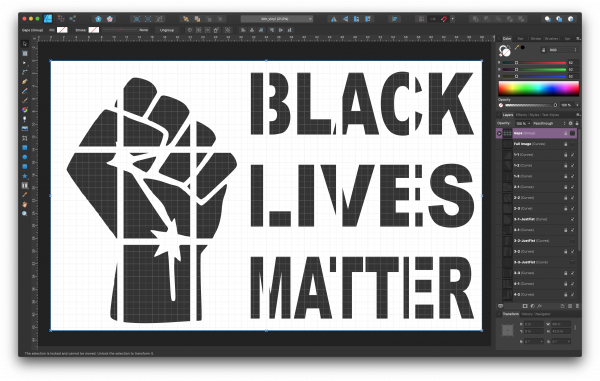
Next, up, I made some artwork. Or more specifically, I found a bitmap image of the fist design and traced it as a vector. Or rather, I asked Super Vectorizer to do so, then cleaned up some of the edges. You can skip this step by downloading my BLM fist vector directly.
Next, I made a mockup of my window panes in my vector app, at a 1:1 scale. I did this in two layers. The panes themselves are a set of rectangles (gray in my mockup). They’re the bottom layer and will be important for slicing up the final image. The topmost layer has a mockup of the strips between the panes (cyan in my mockup). These aren’t used in the final design, but help you eyeball where the gaps sit, so that you can slide around the image and text for maximum visibility.
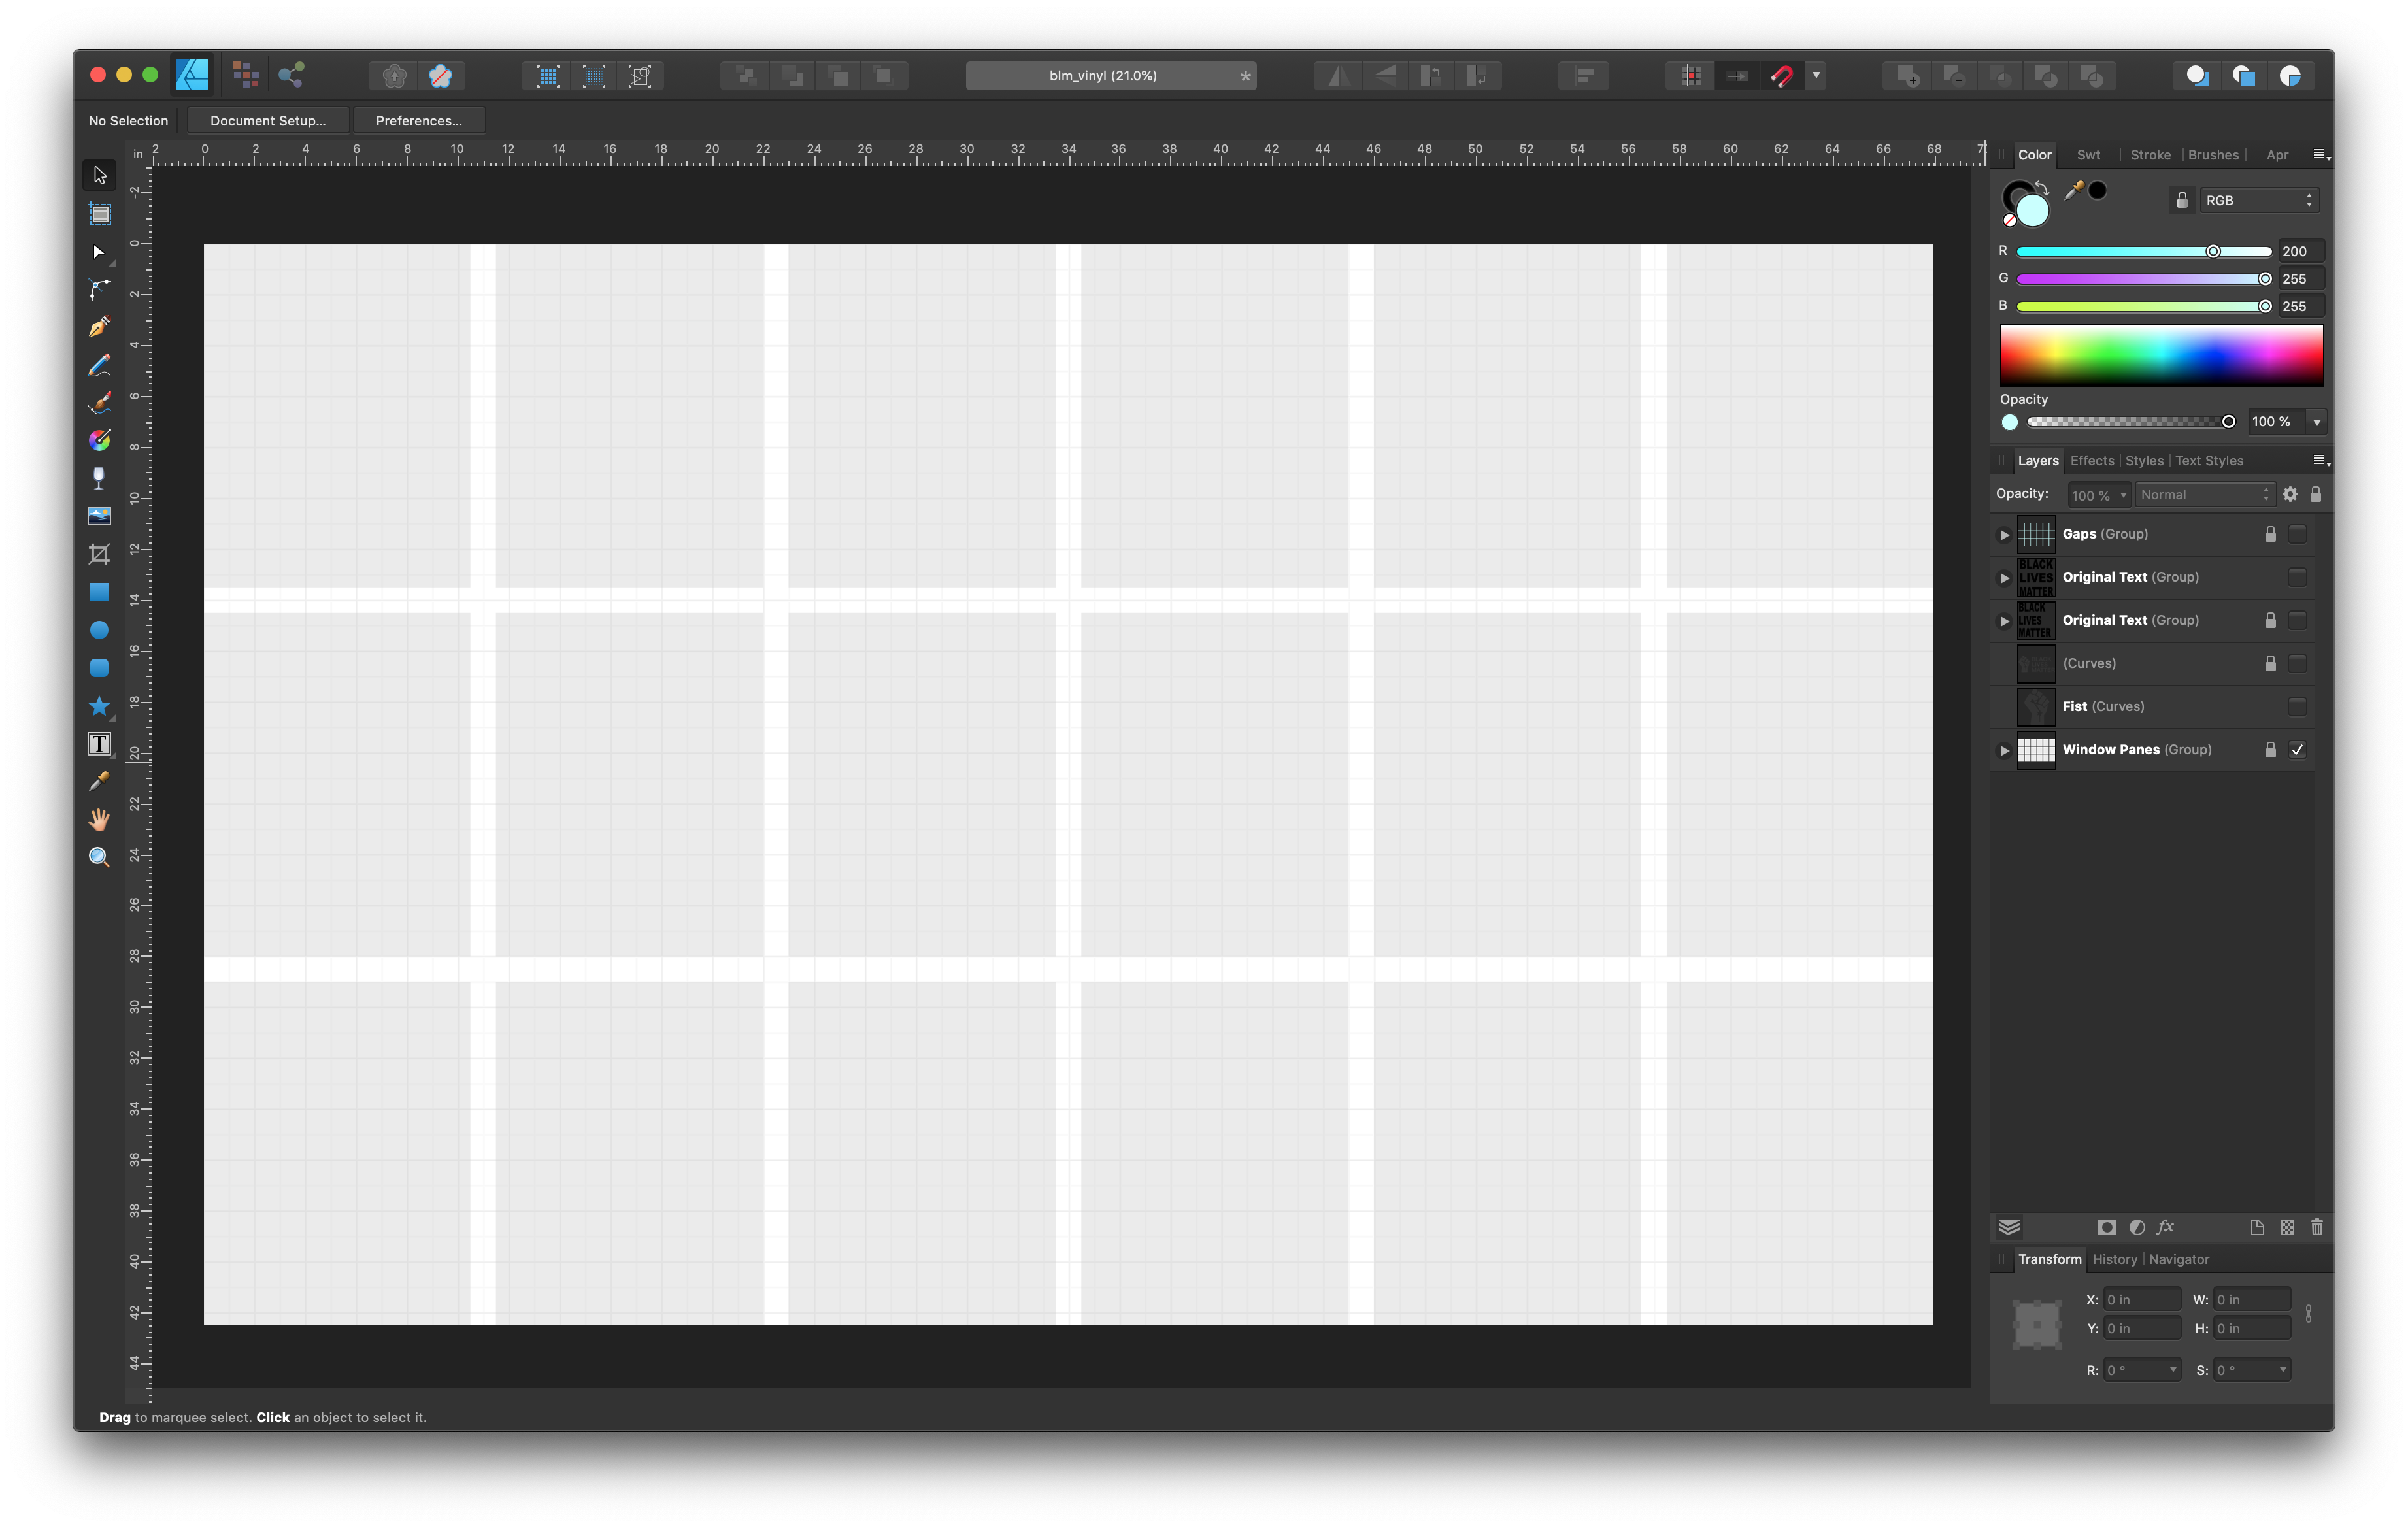
bottom layer — panes 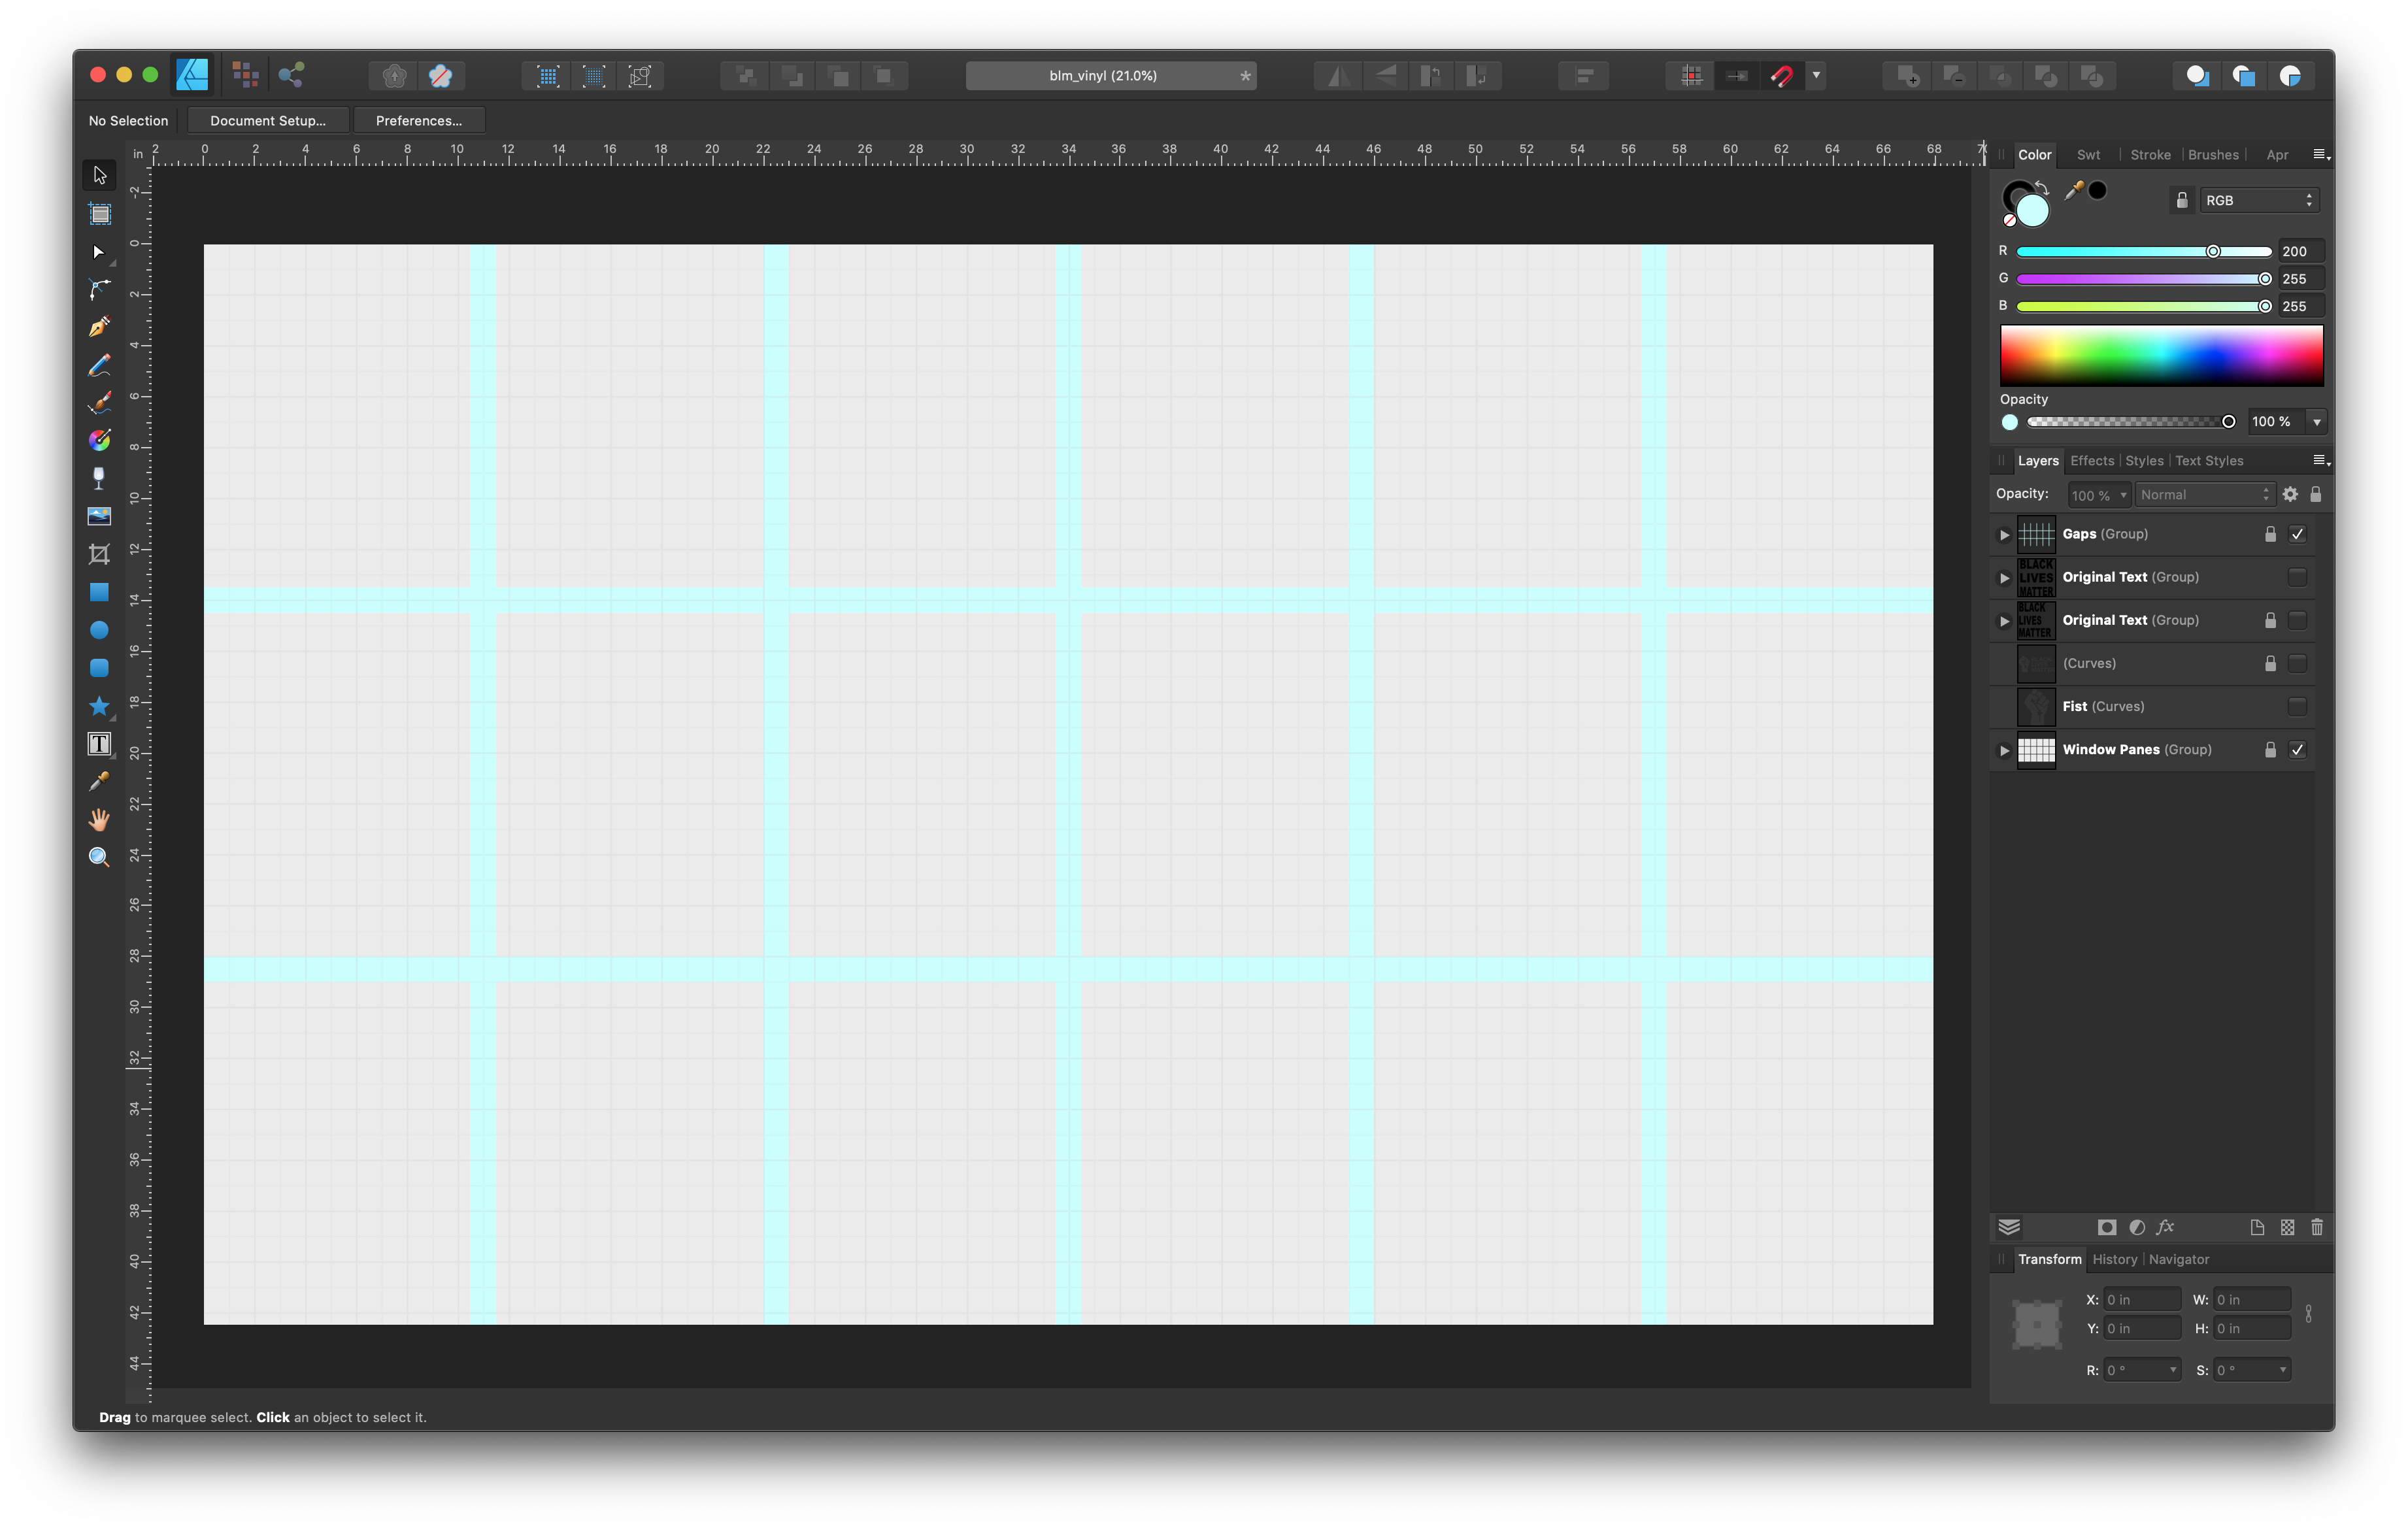
top layer — gaps
Next, take your artwork and place it between the bottom and top layers, scaling and positioning it so it visually fits well. Add your text. One trick here is that after you’ve placed your text, you can use your app’s “convert to outlines” function, then stretch the short lines out to match the long lines, giving a stronger visual style with the full-justification. Make any fine-tuning positional adjustments here, since this will be your last chance to do so. Save a copy of your file.
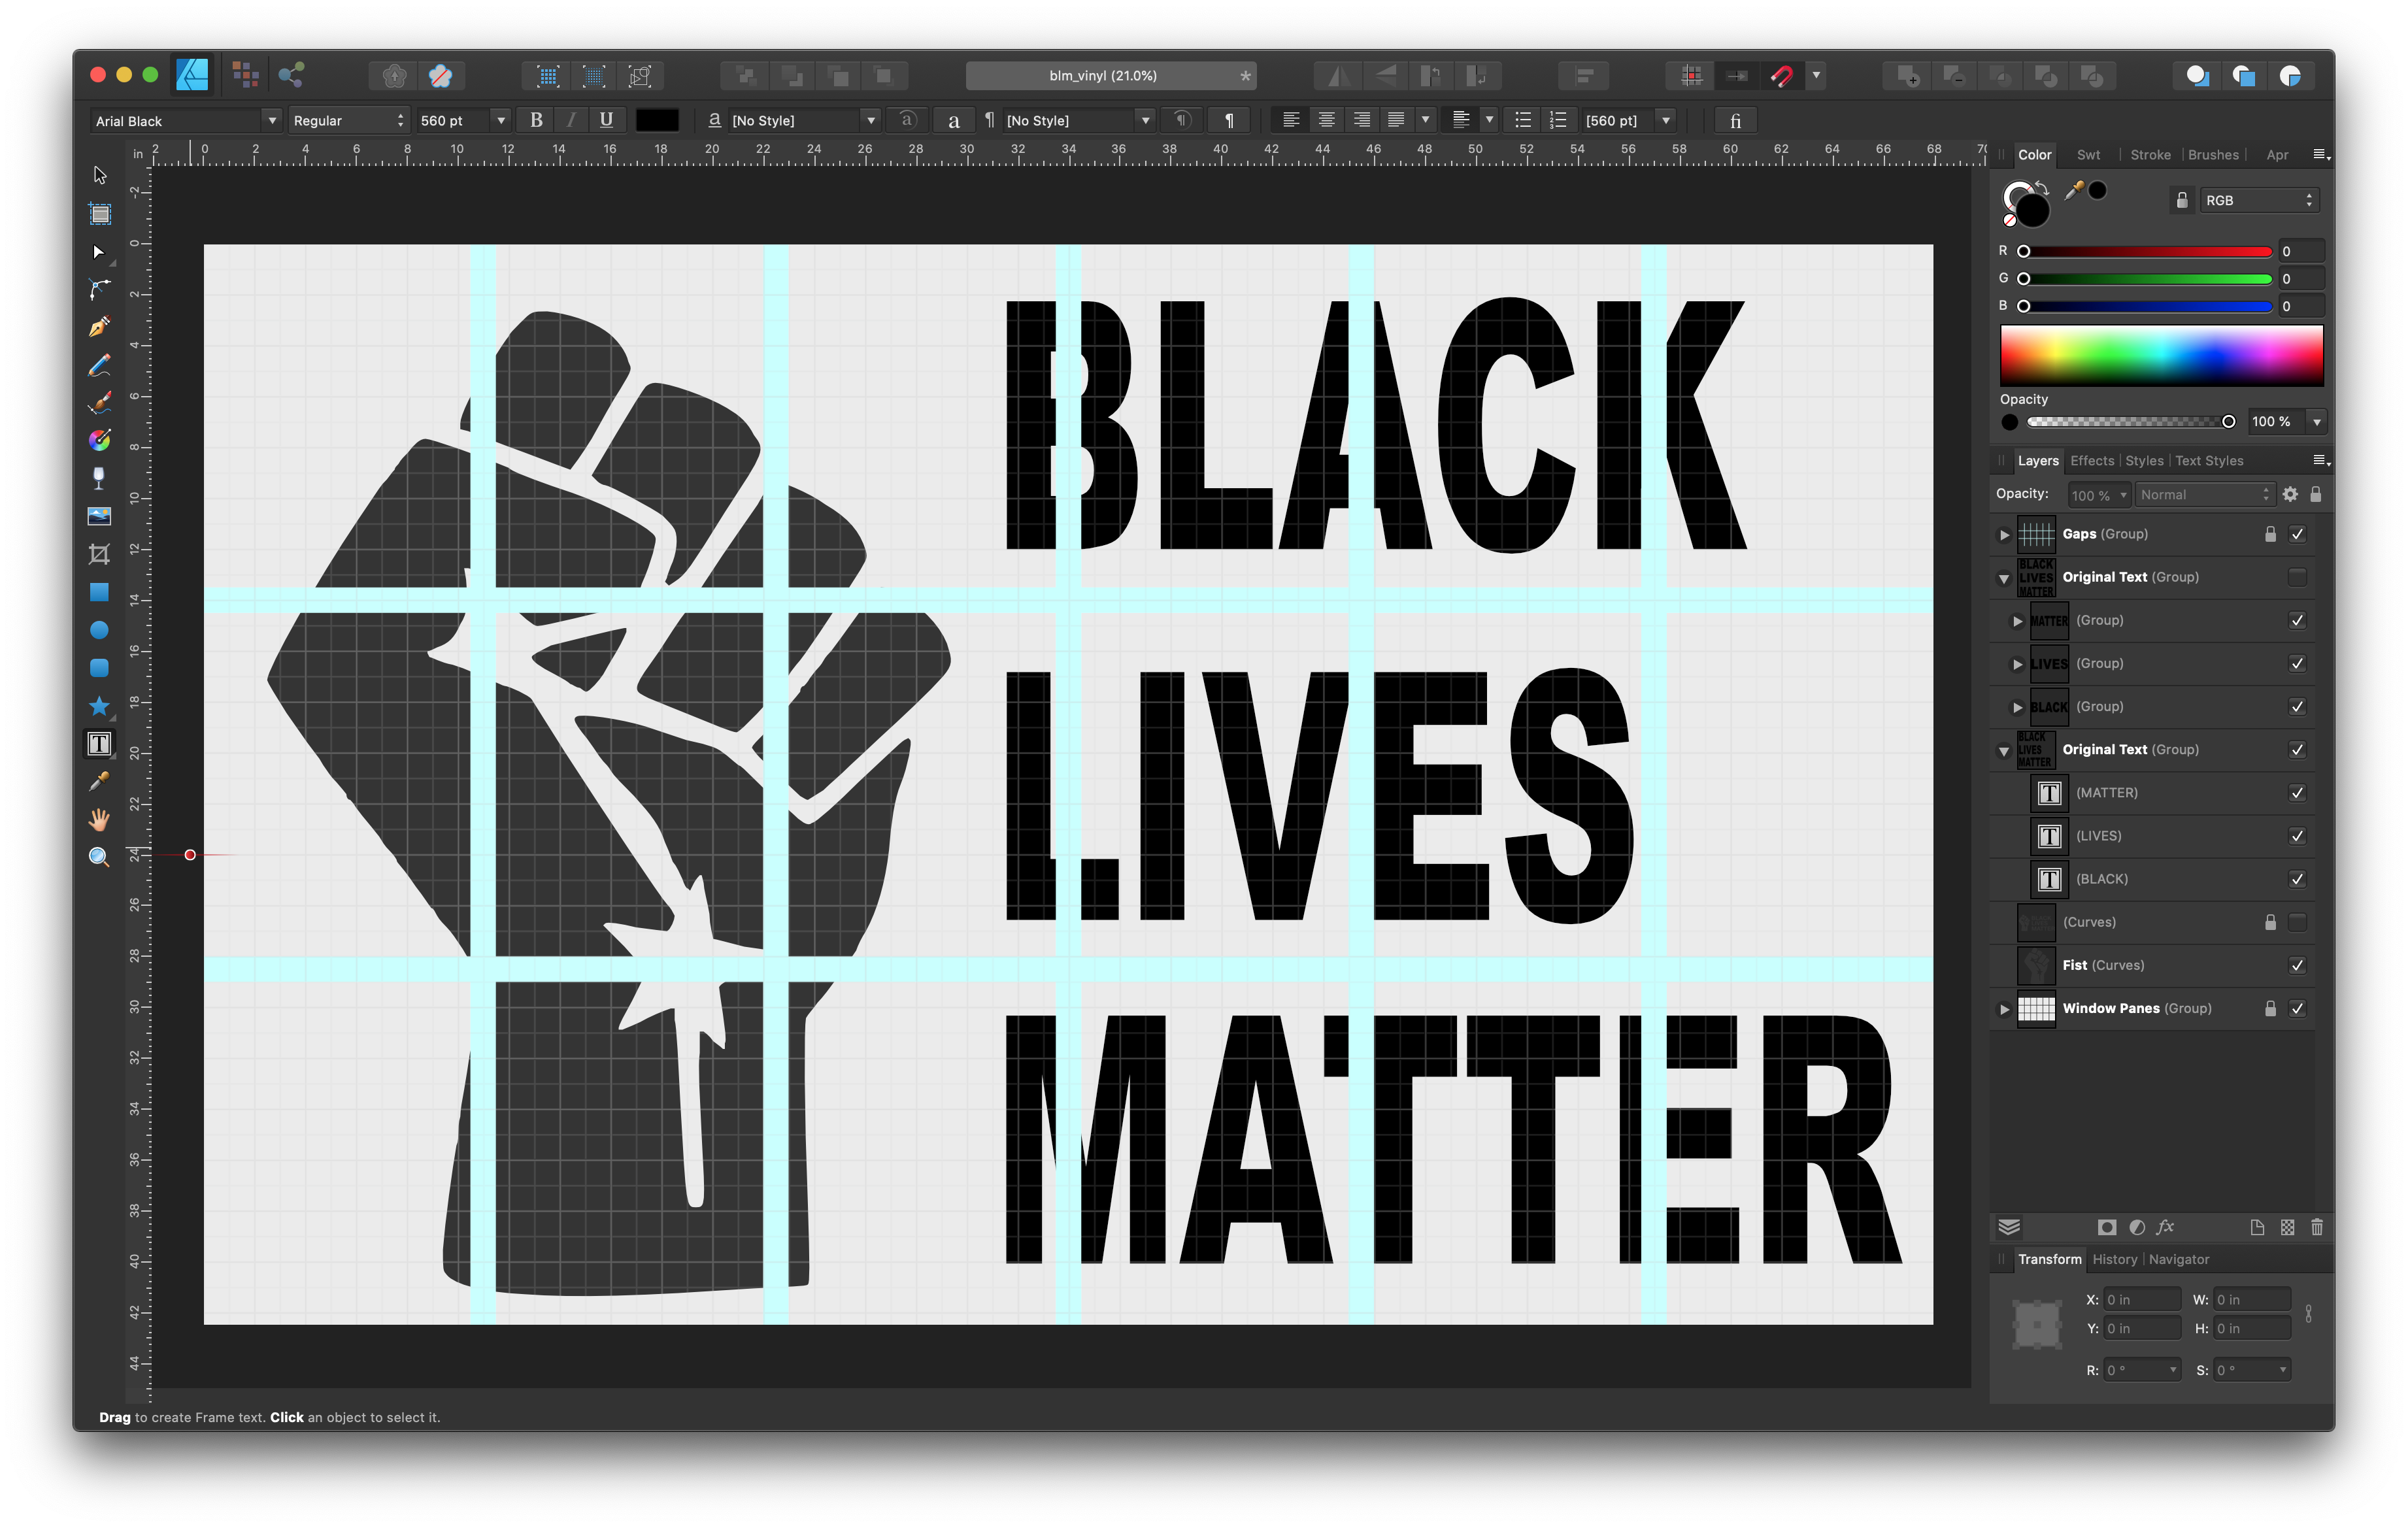
regular text 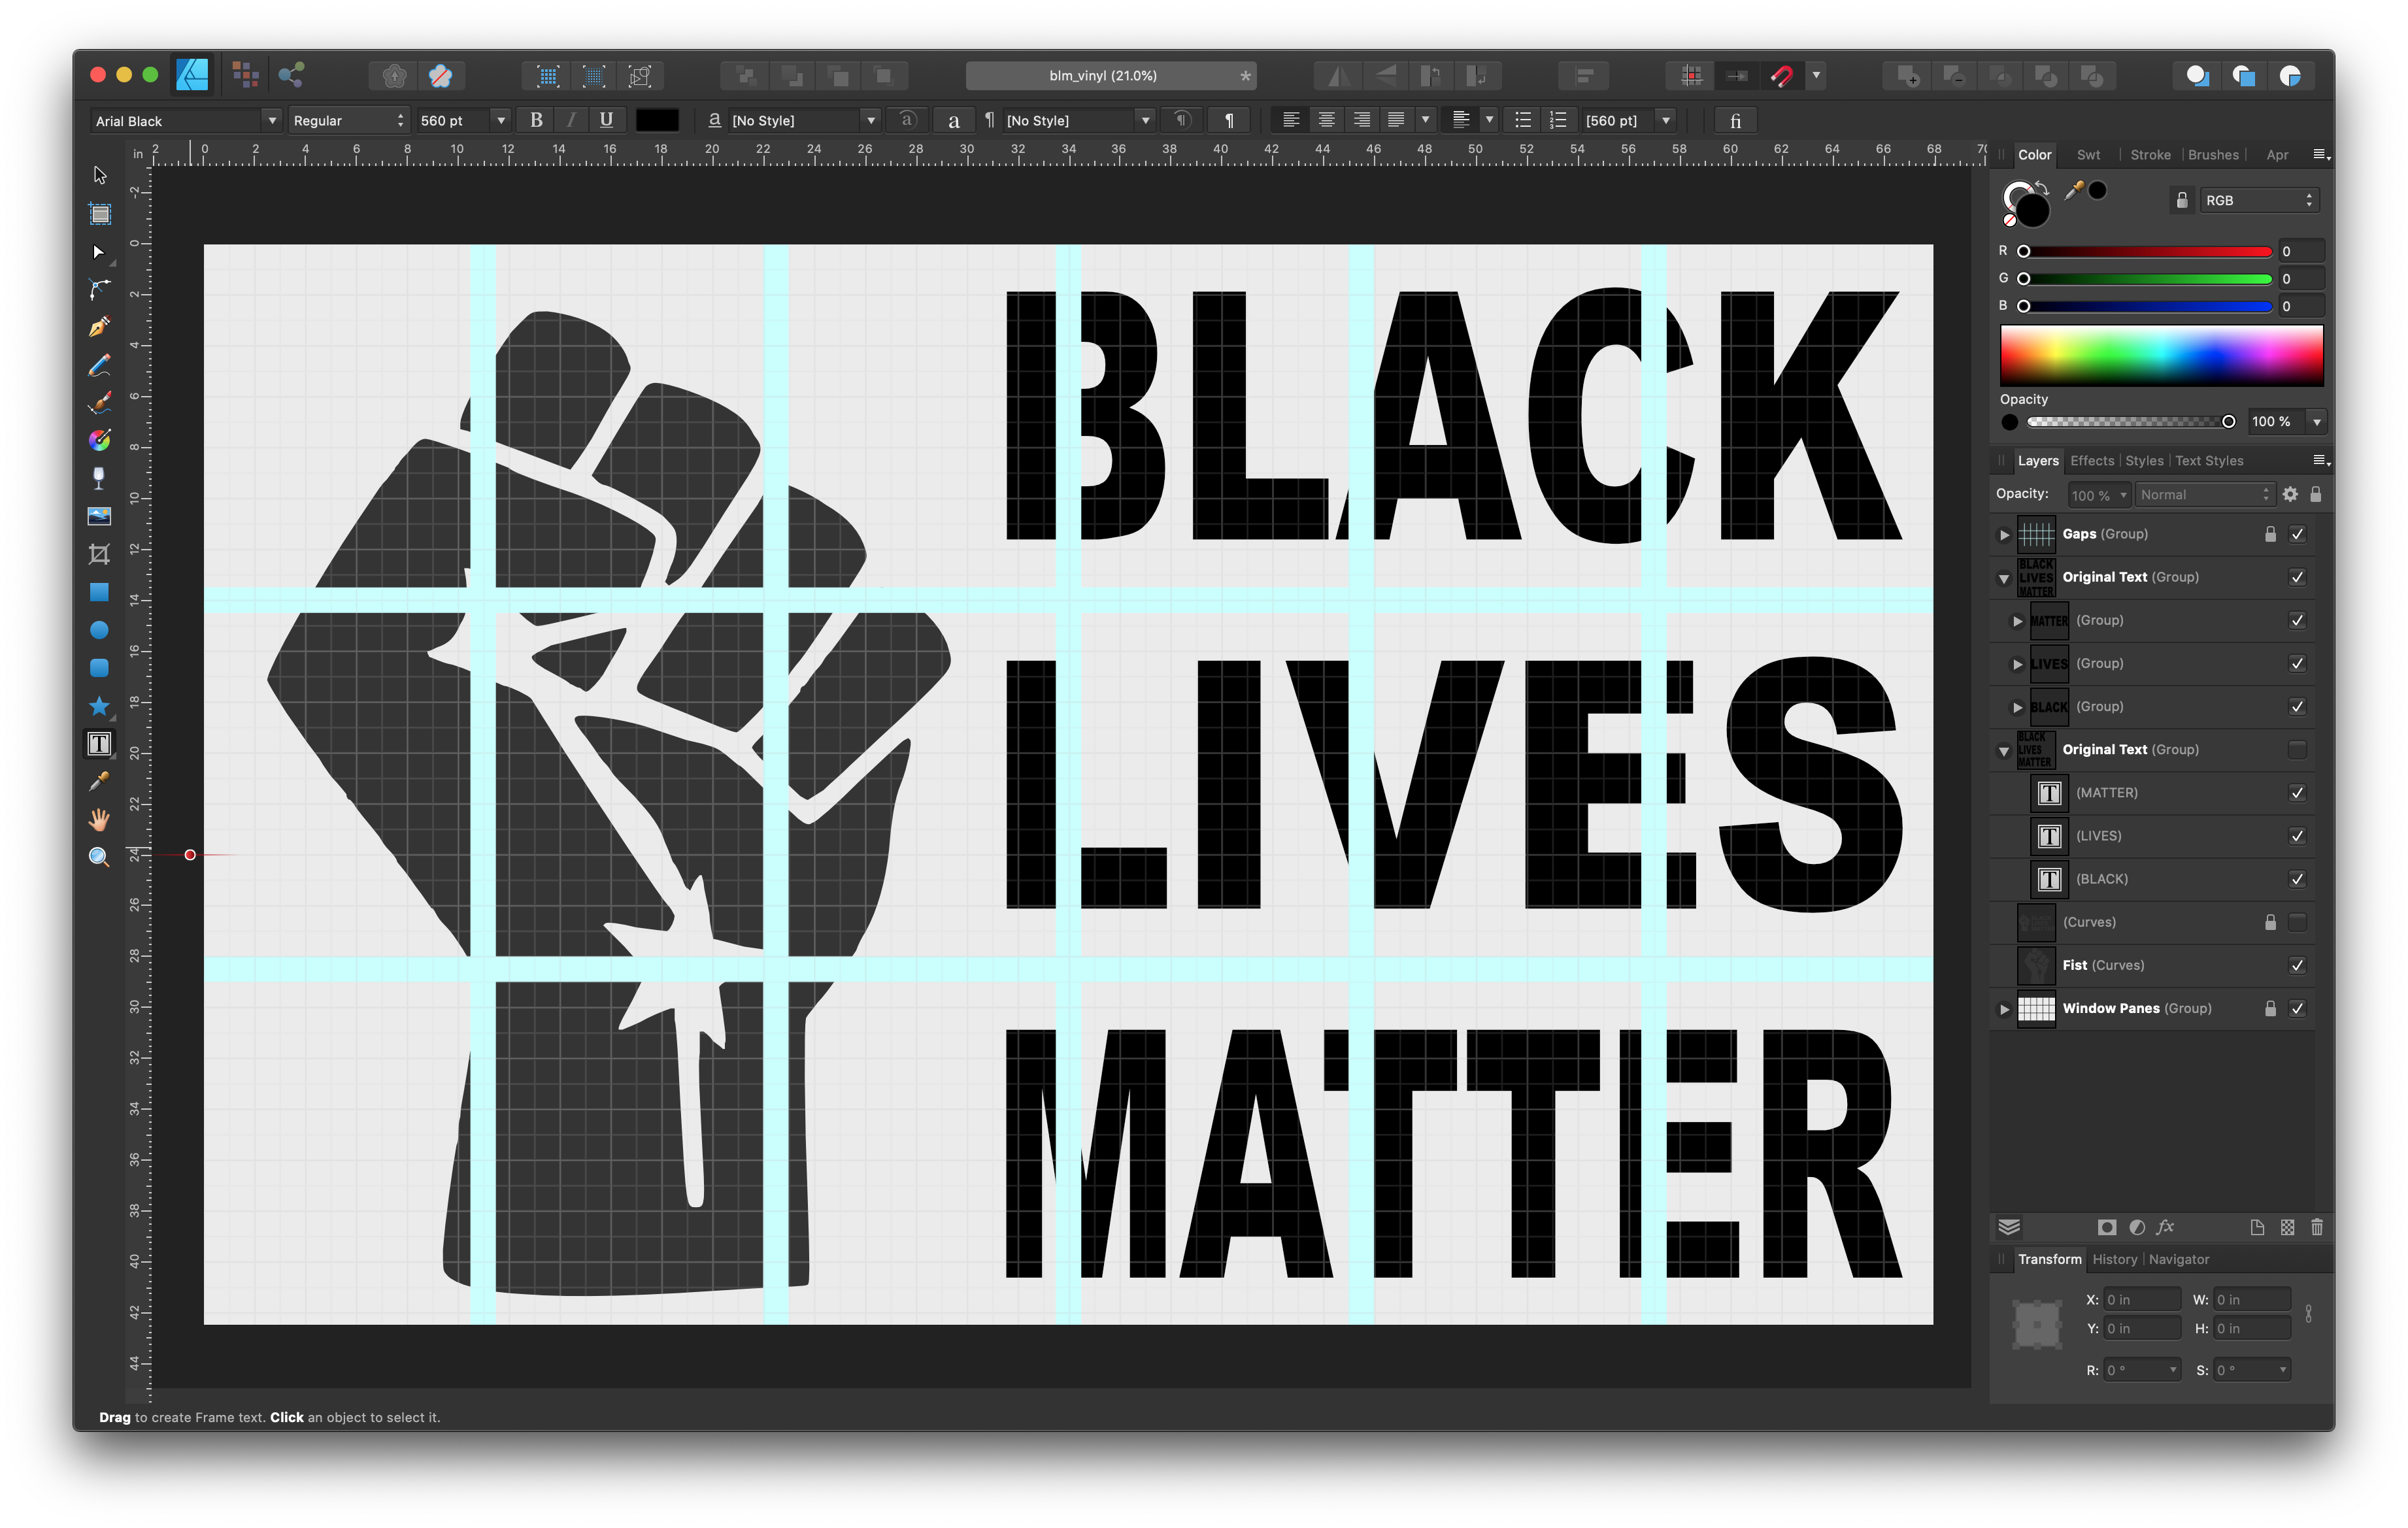
stretched 1st & 2nd lines
Next, you’ll want to use your vector program’s boolean tools to come up with the intersection of your panes and your artwork. This will leave you with artwork existing only where the window panes sit, subtracting out the gaps.
Next comes two tedious steps:
You’ll then want to use your vector image program’s export function to export each of the window segments as a separate file. In my case that would be 6 × 3 files, or 18 total files. I had to do this by duplicating the one layer 15 more times, then deleting all but one pane in each layer, and finally exporting each layer. (Though in my case, to save on vinyl, I cheated a bit and made a few more layers — for instance I split the pane containing the edge of the knuckle and the starting vertical bar of the B into two, to not waste vinyl on the negative space between.) Export each piece as vector artwork, SVG files.
Import those into your vinyl cutter’s application. Because of the way that Affinity Designer exports scale values within SVG files, I also had to manually tweak width/height/position for each one.
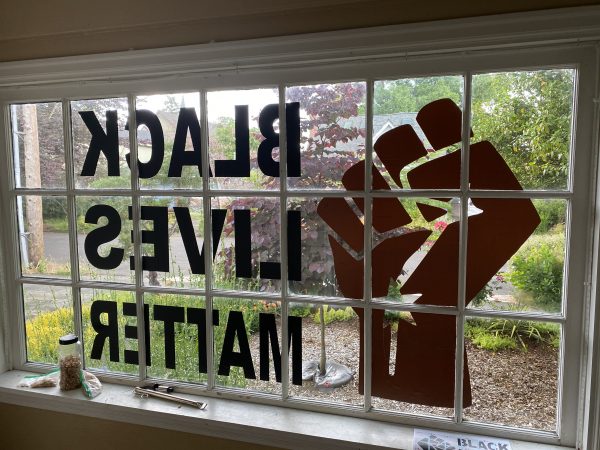
Next, think of where you’ll be putting the vinyl. Is it on the inside or outside of the window? You’ll want to horizontally flip the design if you’ll be sticking it to the inside of the window. This is important to get right (or to catch early on) before wasting a lot of vinyl.
Start by cutting just the logo image panes, attaching that to the clear transfer paper. Use that to get the hang of how the process works for the panes with edge-to-edge vinyl. Remember: lots of planning, carefully measure and place before peeling and applying. It’s easy to mess up. Once the logo is up and you’re starting to get into the flow, the letters are much easier and can go up relatively quickly.


And that’s it. It’s a bit of work, several tedious steps, but so very powerful and fulfilling when it’s done. I have some programmable porch lights, which I made several years back and have revised a few times since, but now, the solid red backlight makes the sticker really stand out at night.
2 thoughts on “Black Lives Matter Vinyl Window Decal”