
(This is a How-To article about setting up a sleep podcast to launch on your iPhone through voice control or NFC. If you just want to get to the heart of the How-To article, skip down to “Attempt Two.”)
Background
I have an occasional insomnia problem. It’s not every night, but maybe once or twice a week I’ll awaken at 2:30am (almost on the dot) and then be unable to get back to sleep. Long ago I discovered the Sleep With Me podcast to help me in this scenario. It’s not for everyone, but a soothing podcast about nothing important is a good fit for my brain.
When I’m in this sleepless state, I have a few things I can do. I can lie there and hope I get back to sleep. I can do something mindless on the phone (which usually tumbles into a doomscroll of Twitter). I can put on a podcast. The problem with putting on a podcast is that I need to reach for my phone, unlock it, find the app, find the playlist, and start playing. This is enough light in my eyeballs and stimulation in my brain to make getting back to sleep just that much more difficult. It would be great if I could do this with my eyes closed.
Attempt One
Two years ago I made a device, with some cloud infrastructure backing it:
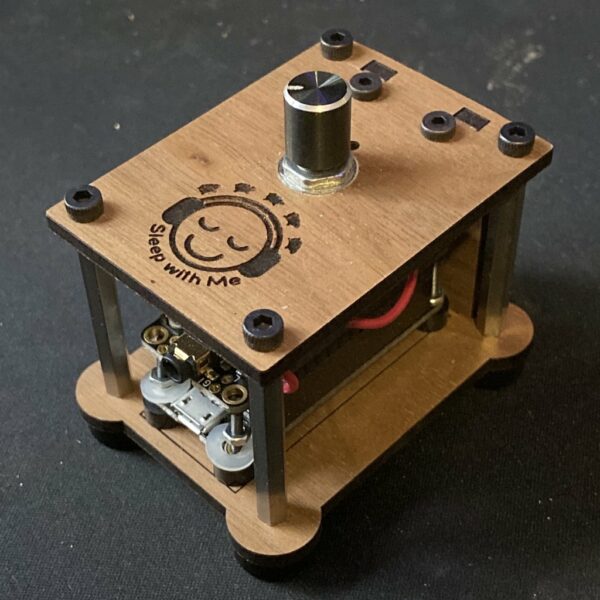
It had USB power, a headphone jack, and an on/off/volume dial. It also had a lot of hacks like a hard-coded WiFi address and a private cloud endpoint. But when switched on, it would connect to wifi (and emit a first beep), connect to a cloud service to parse the extremely large SleepWithMe RSS feed for the latest MP3 (second beep), then start grabbing chunks of that MP3 and feed them into an audio decoder chip (third beep plus the podcast audio). It was “good enough” at the time, but had a few flaws:
- Wires, wires everywhere. The thing isn’t very heavy and between the power cord and cord going to the pillow speaker, it would get tangled and pulled off the nightstand or something would get unplugged.
- The pillow speaker I had was… not great. It was a combination of hard plastic and somewhat crinkly plastic. Putting it on the topside of the pillow in the pillowcase was uncomfortable. Putting it in the bottom side of the pillow required me to turn it up loud enough that my partner could hear it.
- It was always the latest episode. This meant insomnia two nights in a row would get the same episode two nights in a row.
- For some reason I never figured out, but probably timing-related, it would fail to initially latch onto WiFi, so I’d sometimes have to switch it off and then back on again.
After using this for a little while, I went back to my phone — not in part because I got some Sleep With Me branded SleepPhones. (It looks like they only sell a replacement branded headband now, not the full SleepPhones.) This thing is a headband with a small rechargeable BlueTooth speaker pair inside. It’s both comfy and wireless — but BlueTooth, so back to using an app on the phone.
Attempt Two
It took me some time to realize the power of Shortcuts on the iPhone. It took a little longer to learn the power of NFC. My setup now looks like this:
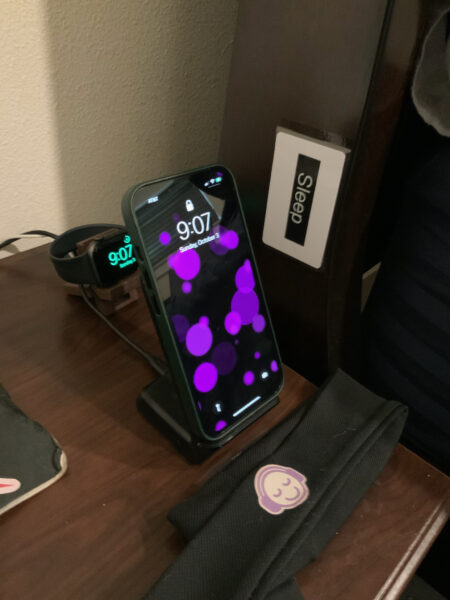
Phone, SleepPhones, NFC Card 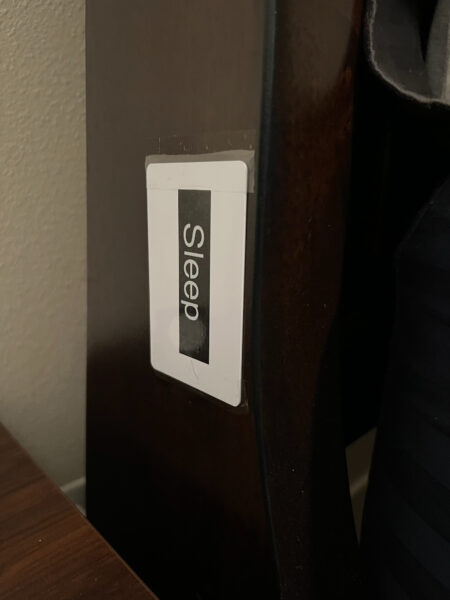
Closeup of the NFC card taped to the bedpost
When I wake up in the middle of the night, I don’t even have to open my eyes. I grab the SleepPhones, put them on, swipe the phone against the little white credit card, then put it back in the wireless charger. The behind-the-scenes magic that happens is this:
- When I turn on the SleepPhones, they automatically pair and connect to the iPhone, making a little beep to let me know they’re connected.
- Taking the phone from the charger wakes it up to the lock screen. You don’t even have to unlock it. While that screen is on (about 5 seconds), it’s looking for NFC cards.
- It senses the NFC card you hold it to.
- It plays a “Shortcut” automation that:
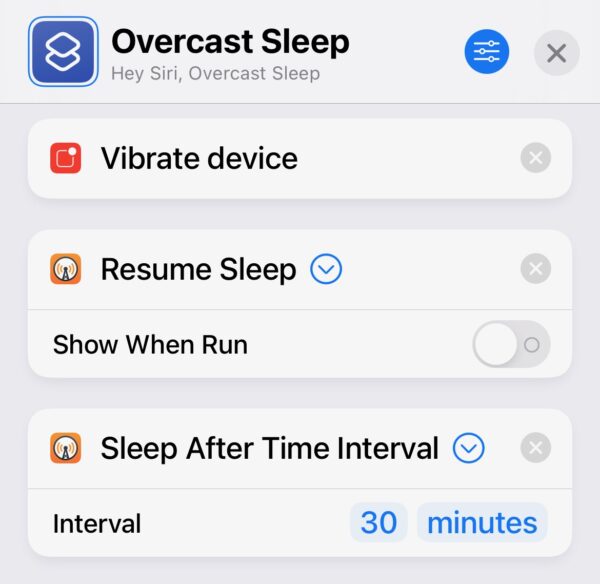
- Vibrates the phone, so I know it sensed the card.
- Launches Overcast, my podcast player of choice, to the “Sleep” playlist.
- Sets a timer to stop playing after 40 minutes.
The only flaw I’ve found in this so far, after about 4 months of using it, is that I sometimes forget to turn off the SleepPhones in the morning. Because I work from home, they try to reconnect to my phone throughout the day, and I’ll occasionally find their battery is dead just when I need it not to be. Remember to keep them charged.
Here’s how I set it up:
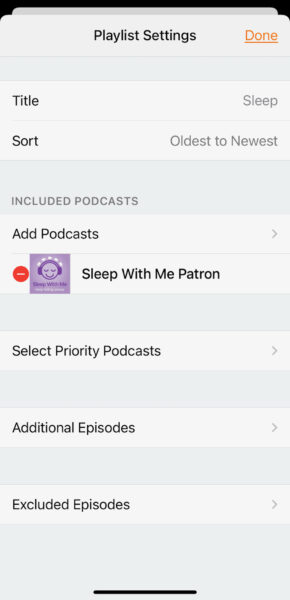
Create the Playlist
First, create a playlist in Overcast. Call it “Sleep” and add Sleep With Me to it. (And yes, the screenshot gives away that I’m a Patreon subscriber.)
Create the Shortcut
You might not have noticed or launched the Shortcuts app on your iPhone. There’s a lot of power in there. You can use menus and pick-lists to write little “programs.”

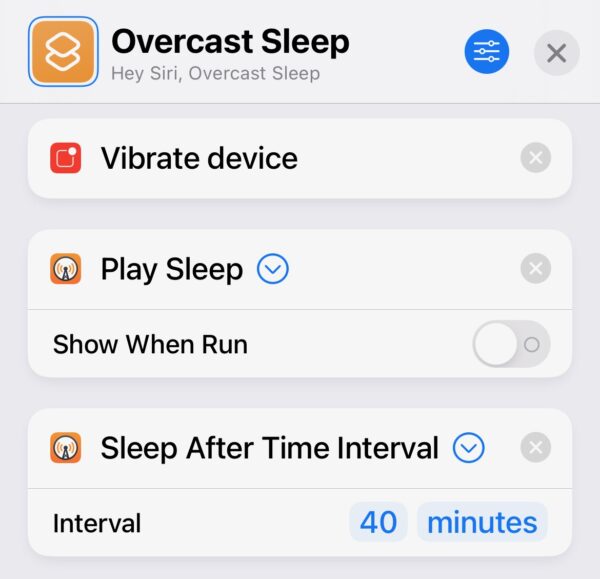
The one we’re going to write is three steps long, and Overcast writes the first step for you. Creating and editing a shortcut may not be straightforward or obvious if you’ve never used Shortcuts before, but it’s still pretty easy. The actions themselves are a little hard to find, so I’ll step you through those parts. This is what the final program will look like:
We’ll start in the Overcast app. That will create the scaffolding of the shortcut that we can then add to. Under Settings, go to Siri Shortcuts, scroll down and you’ll find your sleep playlist in the “Playlists” section. Click on that to create the action. You’ll see a pop-up indicating that Overcast created the action for you.
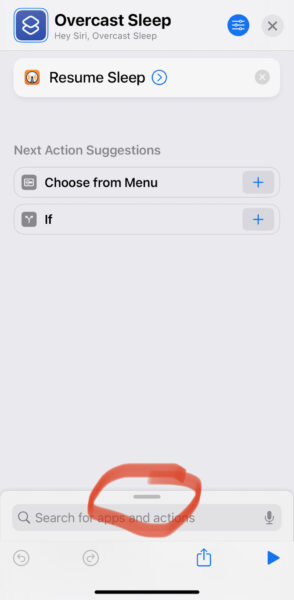
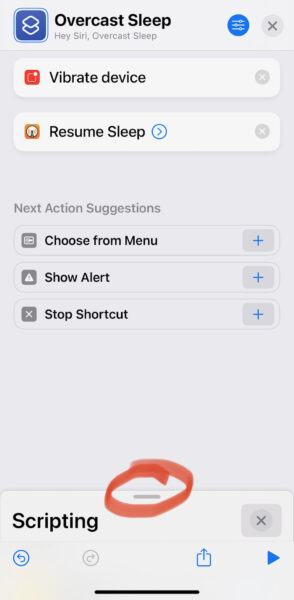
We want to further edit this action to add vibration and a sleep timer, so click on the “Edit in Shortcuts” button up top. You’ll be dropped in the editor and you’ll see one of the three steps we want. You’ll have to add the other two. They’re sort of hidden away in an off-screen palette. Slide up that grab-handle at the bottom.
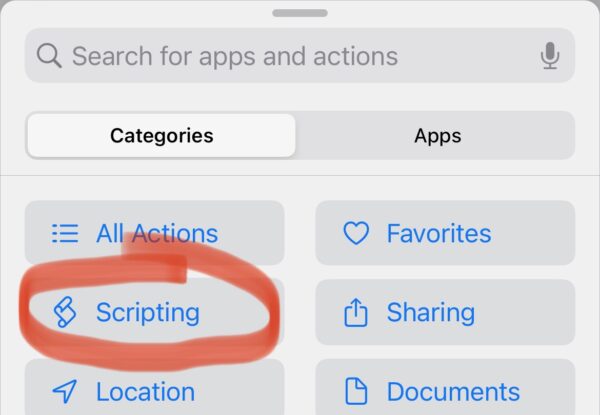
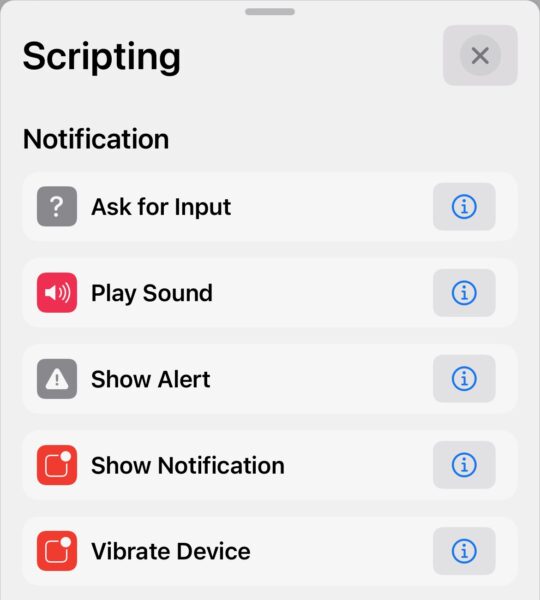
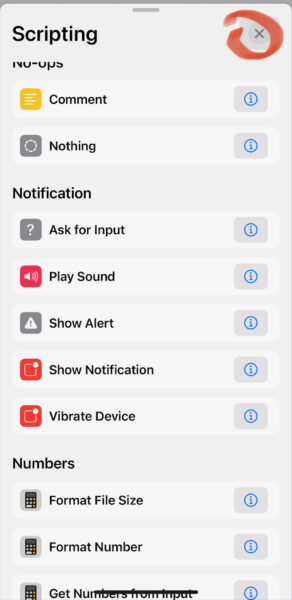
“Vibrate Device” is under “Scripting.” Click on that, then scroll down to the “Notification” section. Click on it to add it to your program.
Once added, you’ll find it at the bottom. Long-click it so you can drag it up above the “Play” step, making it the first step.
To add the sleep timer action, you’ll have to drag up the palette like you did before, then close out the Scripting list with the X.
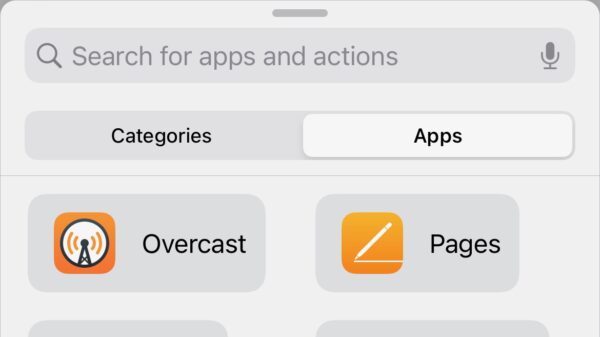
Now select the “Apps” tab and scroll down to Overcast. You’ll find the sleep timer there.
Finally, you can customize your shortcut’s details. Turn off “Show When Run.” Adjust the sleep timer duration to your liking.
Click on the X to close it out, then click on your newly created action to manually launch it. You must manually launch it first because there will be some permissions pop-ups you have to agree to.
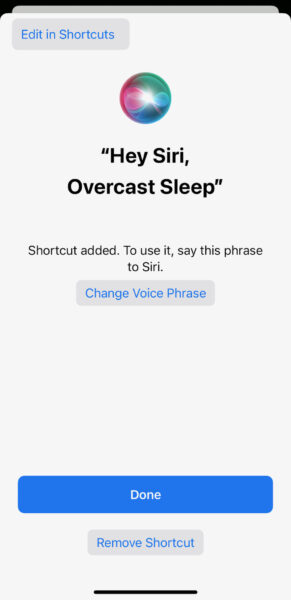
At this point, you can stop if you’re happy with a voice-activated startup. Just say “Hey Siri, Overcast Sleep” to launch your shortcut program. This alone doesn’t work for me because I have security cranked up on my phone. Siri is disabled when my phone is locked. Also, the NFC tag is silent and won’t wake up my partner like a “hey Siri” might.
Create the NFC Action
For this, you will need an NFC tag of some kind. I’ve tried both stickers and plastic credit cards. My personal choice is for the cards. They’re more rugged and I’ve had issues getting the stickers to stick to some surfaces. I end up just taping cards where I need them, like to the bedframe. (Bonus: if you have a Nintendo Switch, you can use the Placiiblo app to create Amiibo-compatible cards.)
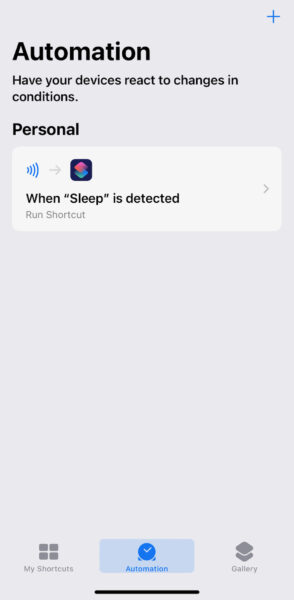
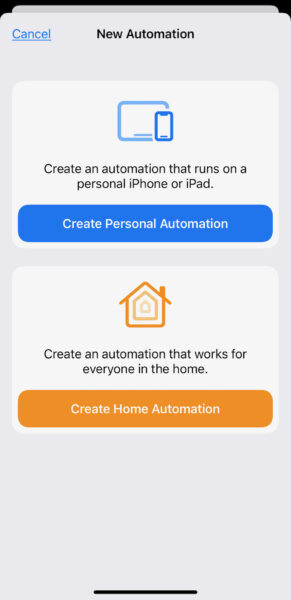
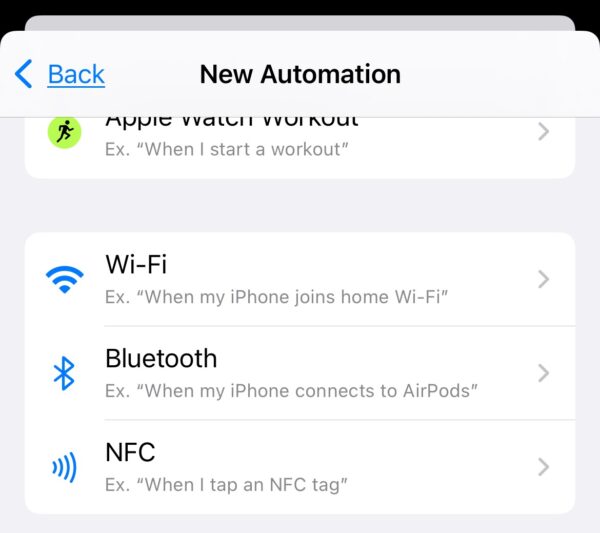
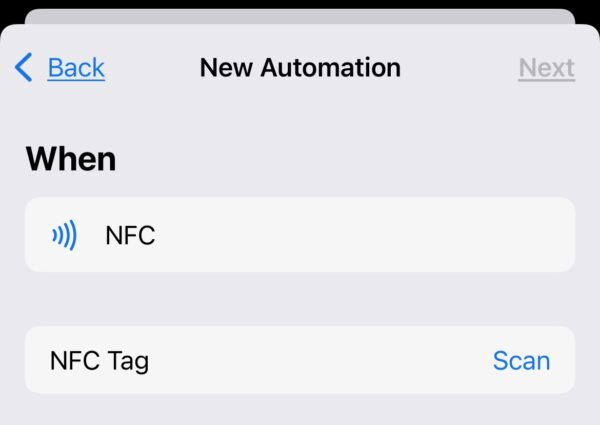
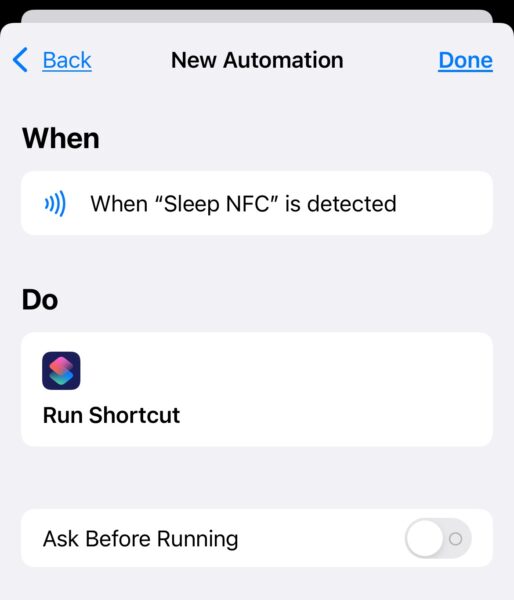
Launch the Shortcuts app again. This time, go to the “Automation” tab at the bottom. Create a new Automation. Select it as a personal one, and a reaction to an NFC tag.
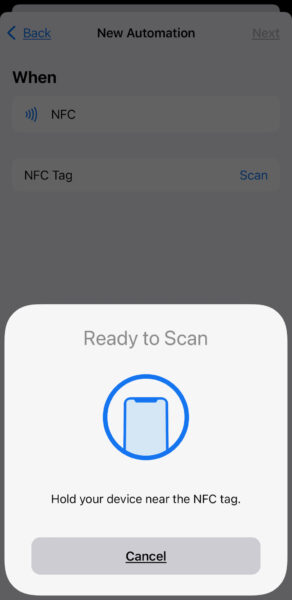
You will then need to scan your NFC card or sticker and give it a name.
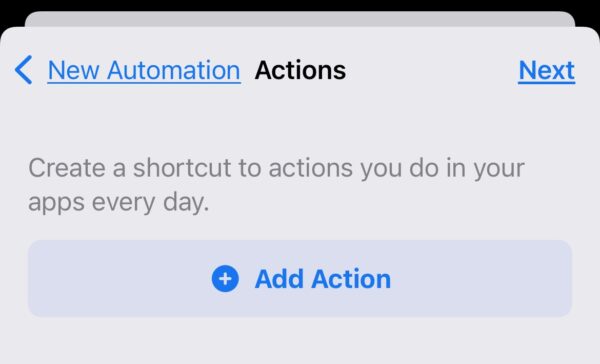
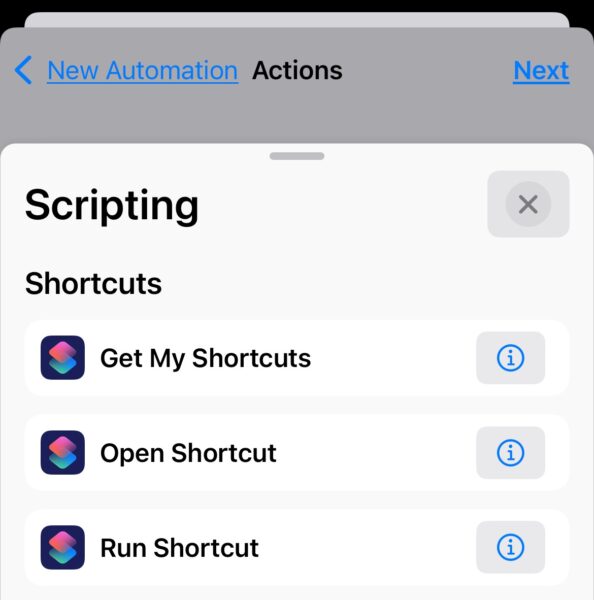
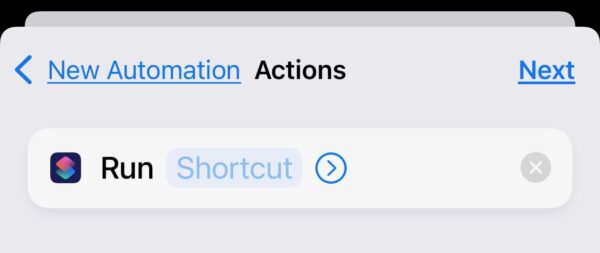
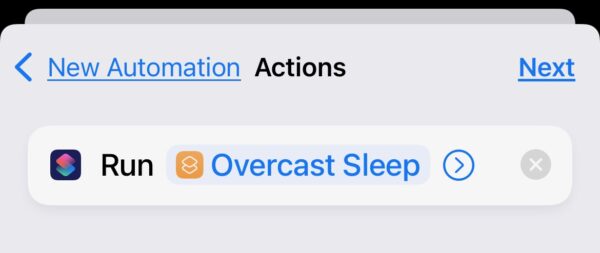
Choose an action. Under Scripting, down in the Shortcuts section, select “Run Shortcut.”
Click on the “Shortcut” placeholder and select the shortcut that you created in the previous section of this How-To.
Finally hit “Next,” disable the Ask Before Running switch, and save the automation.
At this point, you’re done! Swipe your phone against the NFC card and you should get a short vibration followed by Overcast playing Sleep With Me on a timer. Happy sleeps to you!
Let me know in the comments or through Twitter/Email if this worked for you. Also let me know if you had any problems with steps along the way. I’ve done this enough times that I know what I’m doing, but can only hope I’ve added enough detail to easily step you through the process.