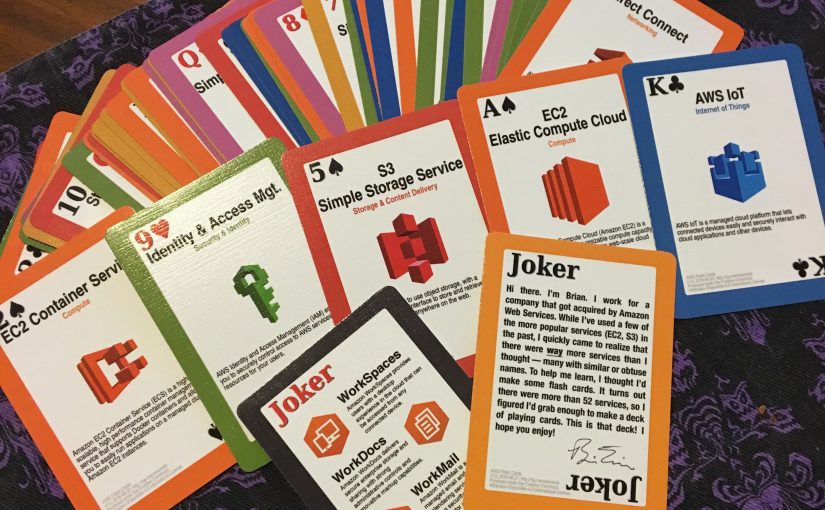
I have used a few of Amazon’s more popular web services, both on the job and on my own. I’ve deployed code to EC2 and Lambda. I’ve synced files and stored backups on S3 and Glacier. I’ve experimented with a few others. But what is WAF? SNS? CloudTrail? I wasn’t even sure I could tell you what those acronyms stood for, much less what the services did. I thought I’d make some flash cards to help me learn what is available.
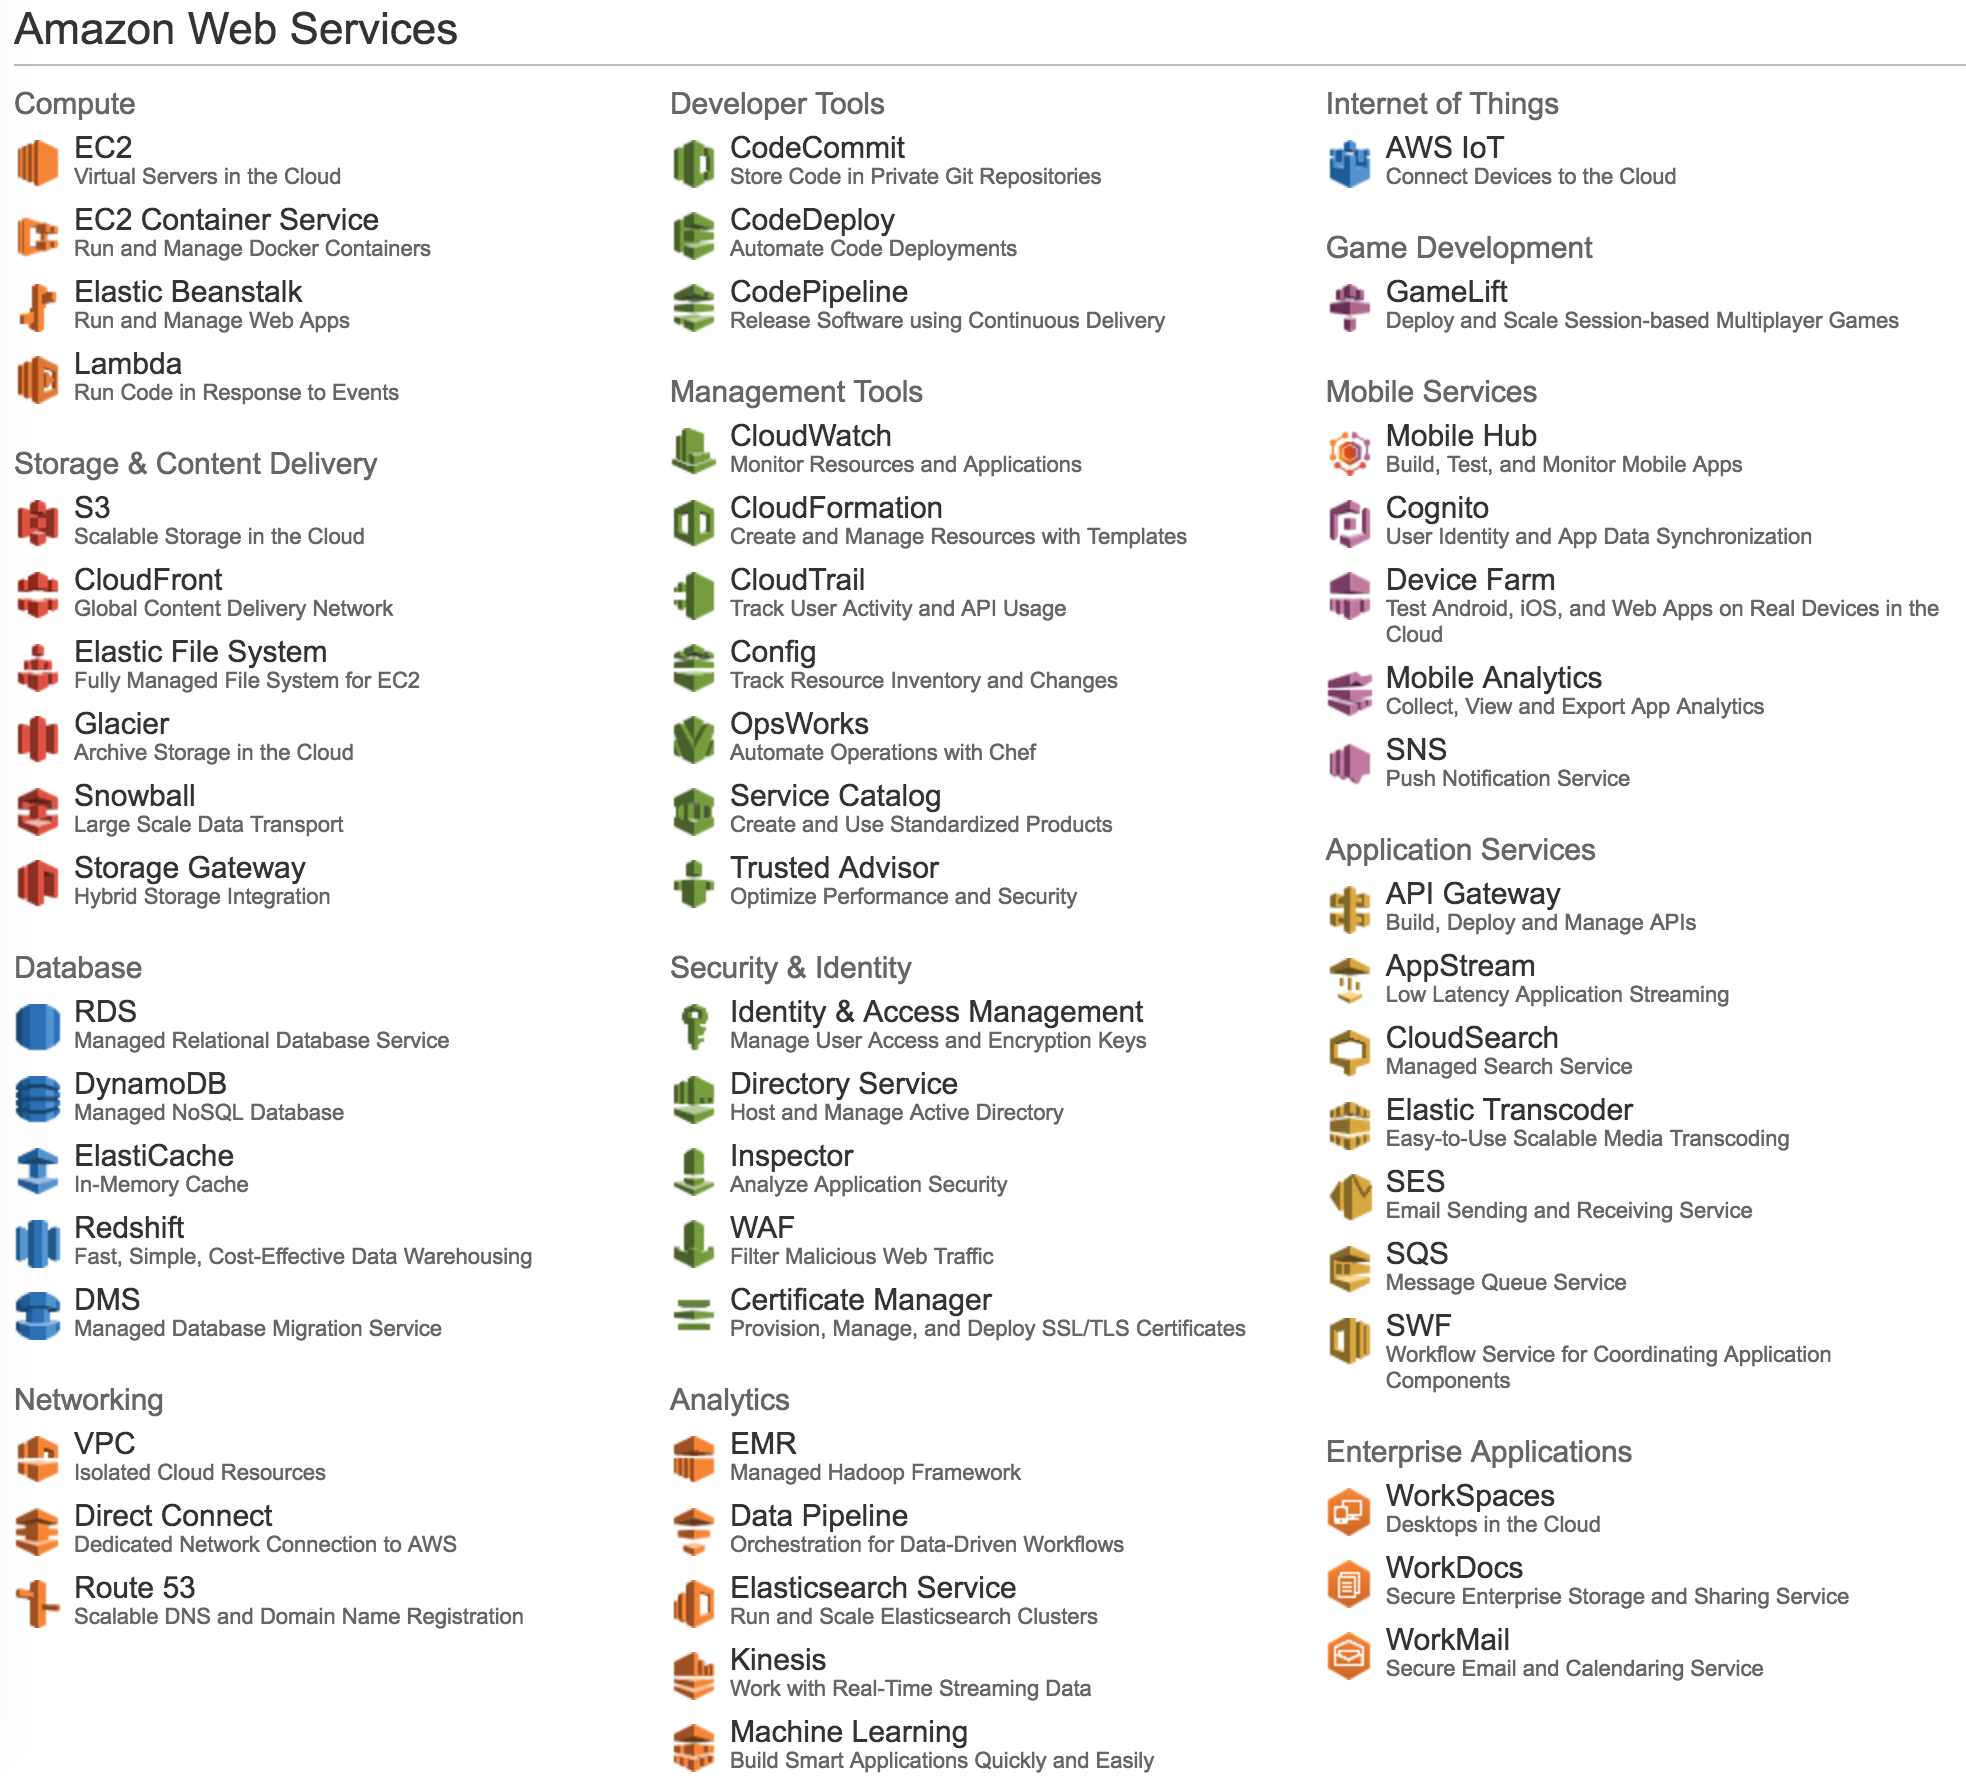
I started collecting data in a spreadsheet and counted 55 services. That got me thinking. There are 52 cards in a standard playing card deck, plus the two jokers. Everything should fit nicely if I doubled-up a card or two. I added columns for suit and value, then arranged the services so no group spanned a suit.

But if I were to make “playable” flash cards, I’d need something a little more fancy than printing on cardstock and manually slicing cards apart. I’d need cards on a thicker cardstock than my printer accepts and that are more precisely cut, potentially with a plastic or waxy coating. This got me thinking. I’d recently bought the Spell Saga Prelude deck from The Gamecrafter. I had poked around the site at the time and learned that it’s kind of like the CafePress of board game design. You upload your artwork and they print on demand boards, booklets, cards, dials, punchout game pieces, dice, and so on. They even let you set up a storefront and drop-ship to customers.
I grabbed their template for a standard poker card. It’s just a PNG, 825px × 1125px, including bleed and a safe zone for cutting.
At that point, I starting to think about how I would make the artwork for the cards, jokers, and reverse. I wasn’t too keen on manually creating 55 Illustrator files. I looked toward Ruby because there are tons of libraries available. For the best image fidelity, I wanted to go with creating vector outputs, then rendering them down to bitmaps. Unfortunately the SVG libraries that kept popping up as the most popular didn’t allow me to insert images (such as the AWS icons) in my output. I begrudgingly ended up with RMagick, the Ruby bindings for the ImageMagick library. It doesn’t do vectors (or possibly, the vector functionality is poorly documented), so I used it to directly output PNG files.
The code I wrote to generate the card images from a CSV input file lives at https://github.com/BrianEnigma/aws_flash_cards. You can also find the final card artwork there.
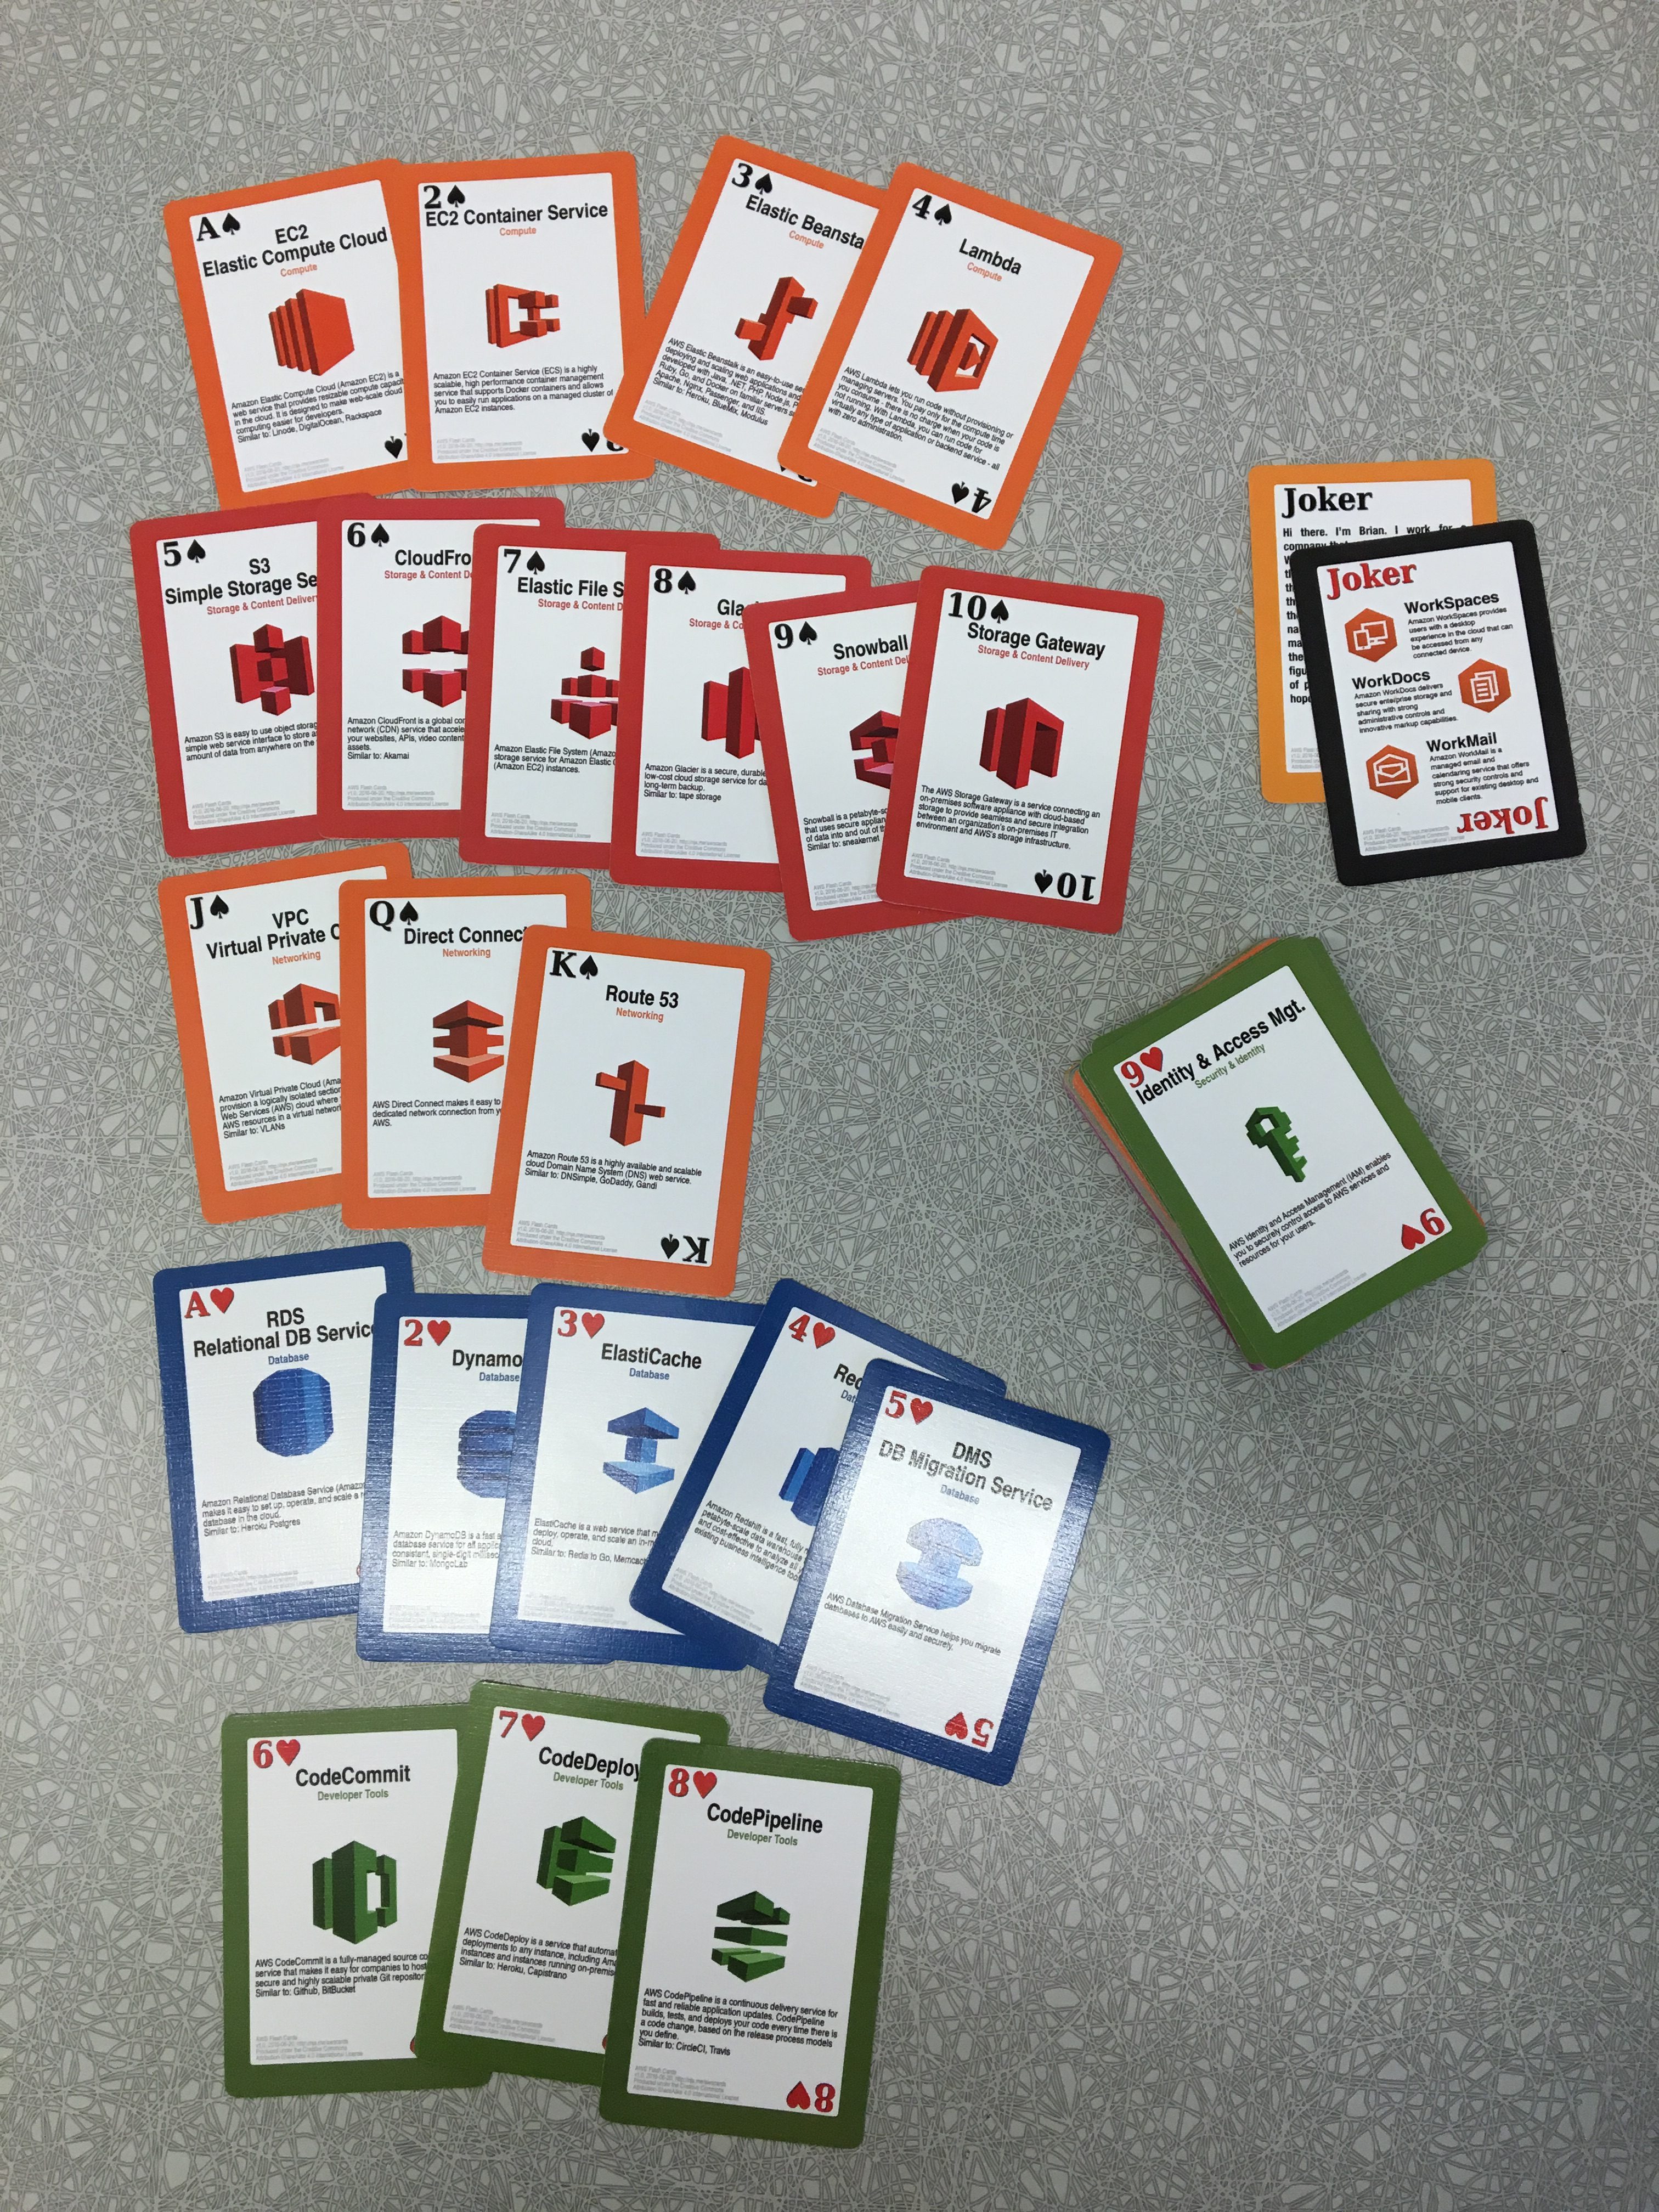
I uploaded these to The Gamecrafter and 2 weeks and about $20 later (surprisingly affordable, as this includes shipping!) I had two decks of cards that look a little something like this:
Funny thing: I had to re-learn how to deal a Solitaire spread! The computer or iPhone always does this automatically. I hadn’t played Solitaire with a real deck in over a decade, so had no memory of exactly how many columns to deal.
I’ve since done a minor revision involving wording and text size (and am awaiting the reprint to arrive in the mail), but I believe they’ve turned out pretty well.