Treat this blog post like one of those annoying internet recipes. If you just want to get to the setup and code, then scroll past this “Background” section.
Background
The Adafruit Feather Huzzah is a small dev board that packages an ESP8266. That chip is a wifi-only version of the ESP32. (In other words: no Bluetooth.) Adafruit offers a whole line of wireless boards that work especially well with their Adafruit IO IoT service. It’s a great service. A lot of that greatness lies in its simplicity. But several of the projects I’ve wanted to use the Feather with have needed a little more tight integration with AWS services, such as Lambda and API Gateway. AWS’s own IoT service has a higher security bar, which means secure HTTP and strict certificate checks, for both the client and the server.
Adafruit IO works using unauthenticated https and some secret password strings. This is totally fine for hobbyist projects, and in fact keeps the implementation super-easy. The client only cares that it’s connected to an https server. It doesn’t care whether the certificate is self-signed or came from a proper certificate authority. A clever hacker can exploit this using a person-in-the-middle attack with a self-signed certificate. Symmetrically, the server doesn’t care who the client is, as long as they present the expected pair of credentials (effectively: a username and password). This also opens the path for person-in-the-middle in that direction — of a hacker just capturing and reusing the authentication information. Amazon designed their IoT to be a little more “enterprise.” Both the client and server have a public/private key pair. This allows each to trust the other’s authenticity, even in hostile environments. BUT the tradeoff is that you now have a much “heavier” implementation on an embedded client.
When I last looked at using an Adafruit Feather for IoT type work several years back, the pickings were slim. There wasn’t yet a good client-side certificate library, and I wasn’t into it enough to roll my own. I don’t think Adafruit’s IO even existed yet. The route I took totally side-stepped the problem. It didn’t use AWS IoT at all. I used Lambda and API Gateway to do exactly what Adafruit IO now does: HTTPS without checking any certificates, and identify clients with an obfuscated “secret” token. It worked for the simple needs of the projects: broadcasting from server to client semi-realtime lighting information (paper lanterns) and grabbing a multi-megabyte RSS feed and distilling it down to just a few dozen bytes (podcast player).
I’m now looking at a new project that could use the instant reaction times of MQTT messaging and which would also need other infrastructure living in AWS. Instead of doing something weirdly hybrid between Adafruit and AWS, I’d like to go full AWS-native. Since I last looked at doing something like this, there is a GitHub project called aws-iot-esp32-arduino. I’m sure it worked when it was last updated, two years ago, but it fails to compile now. In digging into the internals of the dependencies, I see that the SSL portion is handled by a project called BearSSL. Either BearSSL changed their API, breaking compatibility, or the ESP32 SSL was previously provided by a different package. Either way, the aws-iot-esp32-arduino project and BearSSL do not match up. It also had conflicts between the native wifi client library and the current ESP8266 wifi library that needed some header file wrangling. To top it off, that sample focuses on publishing data from the device to AWS, and my upcoming project needs communication in the other direction. Some of the AWS configuration steps changed slightly, too. I thought it would be good to post my own setup instructions and sample code that works with a modern environment.
AWS Setup
You’re going to need an AWS account. If you arrived at this page, I think you already know that’s a given. I won’t go through the steps of creating one.
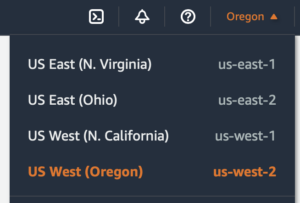
- Use the region dropdown to select the closest region to you. In my case, Oregon.
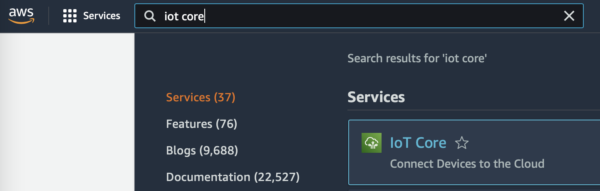
- Use the services search bar to get to “IoT Core.”
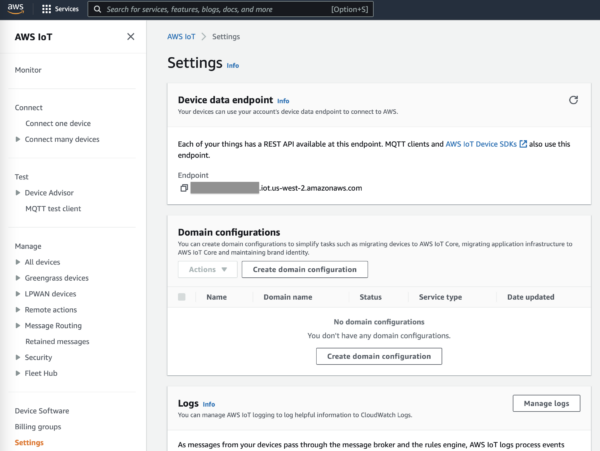
- Use the left navigation to get to “Settings” and copy down the Device data endpoint. It looks something like
xxxxxxxxxxxxxxxxxx.iot.us-west-2.amazonaws.com
- Use the left navigation to go to Security > Policies and click the orange Create Policy button.
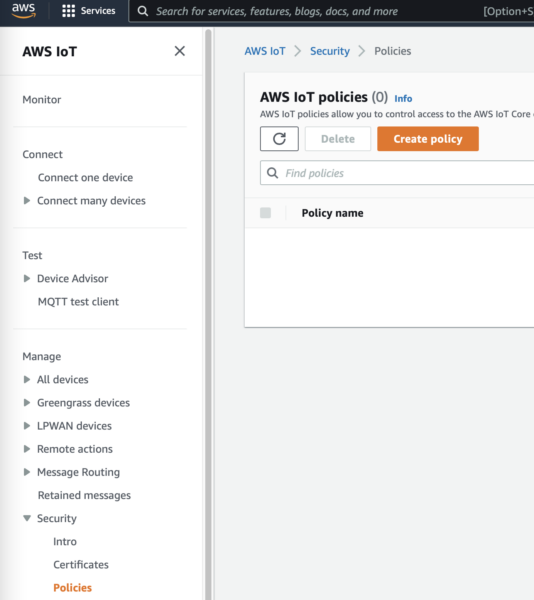
- Give it the name
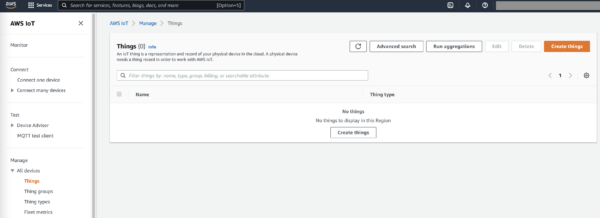
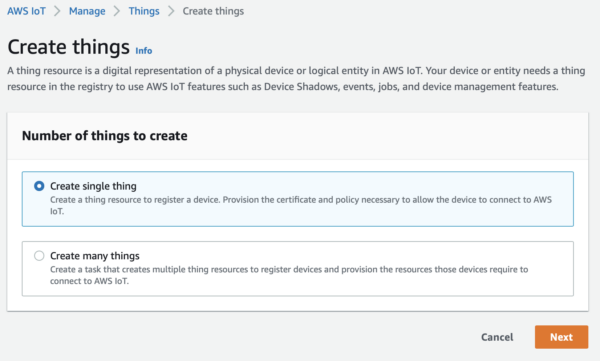
feather_policy(or whatever you’d like to call it). Under “Policy Document,” chooseallowfor the effect, choose*from the action dropdown, and type*into the resource. These are the most open permissions. Feel free to constrain them further if you’d like. Finally, click the orange “Create” button. - Using the left navigation, go to All Devices > Things and click the orange “Create things” button.
- Create a single thing.
- Call it
feather(or pick a more specific project name).
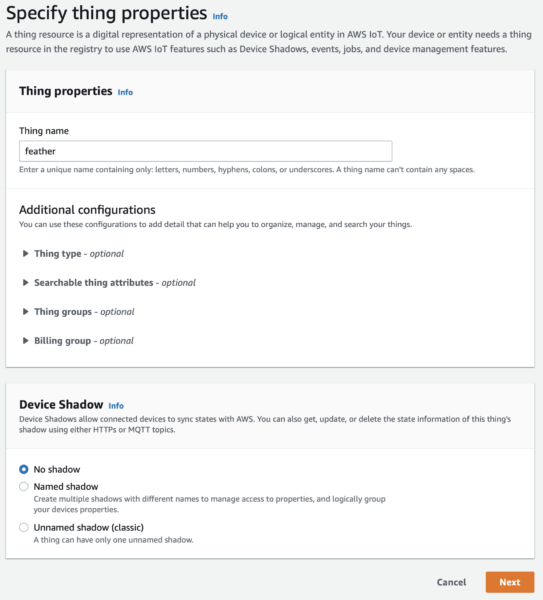
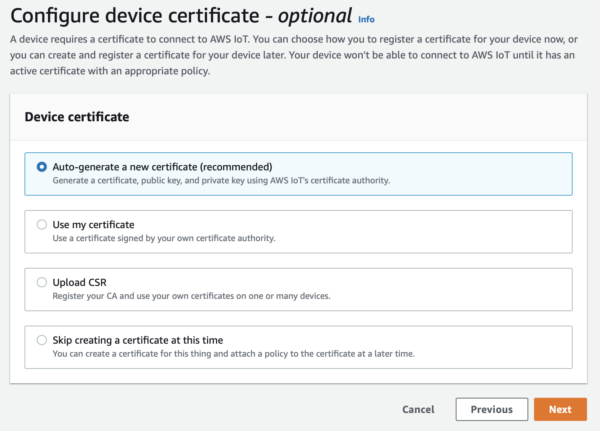
- Auto-generate a new certificate.
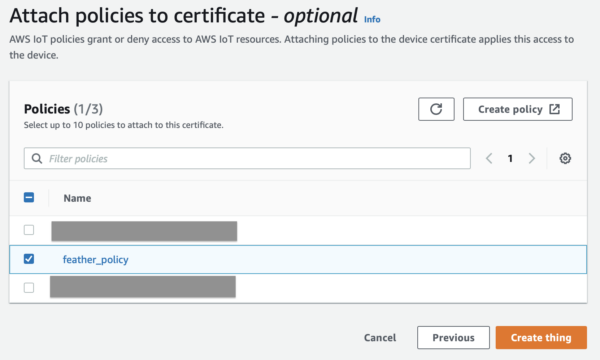
- Attach the
feather_policyyou just created.
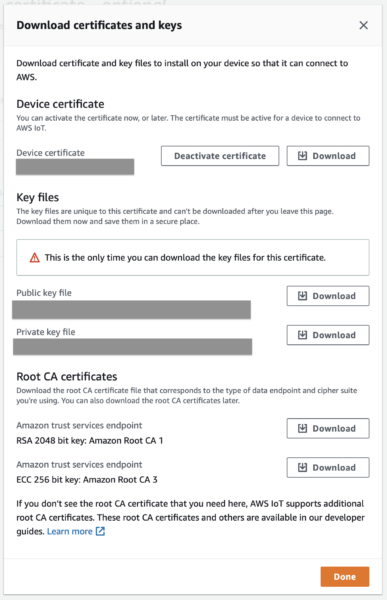
- Download all the things! At a minimum, you’ll need the Device Certificate,
private.pem.keyand theRSA 2048 bit Amazon Root CA 1. But you might as well download everything just in case.
Arduino Setup
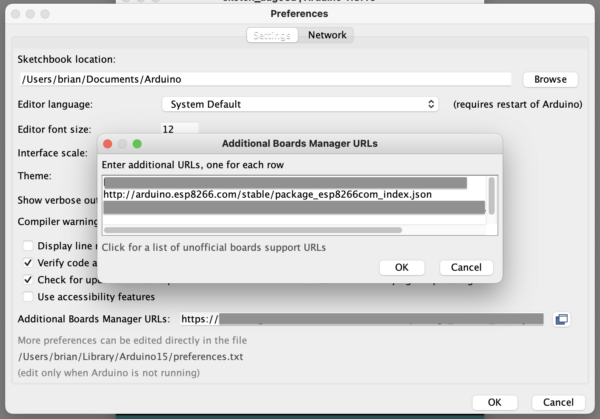
- Follow the Adafruit Feather Huzzah Arduino IDE Setup Instructions. This amounts to downloading USB serial port drivers, if you need them, adding
http://arduino.esp8266.com/stable/package_esp8266com_index.jsonto your Arduino board manager, and installing theESP8266package through the board manager.
- Under Sketch > Include Libraries… > Manage Libraries…
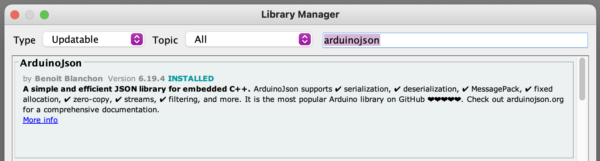
- Search for ArduinoJson by Benoit Blanchon and install it. This library packages and unpacks message payloads.
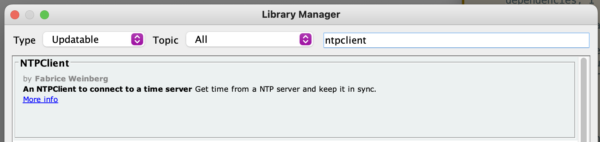
- Search for NTPClient by Fabrice Weinberg and install it. This library verifies the issue and expiration dates embedded in certificates.
- Download the latest zip file of 256dpi/arduino-mqtt from GitHub.
- Using Sketch > Include Libraries… > Add .ZIP Library… point to the zip you just downloaded.
Test Uploading
If you correctly followed the Adafruit Feather Huzzah Arduino setup, you should be able to go to File > Examples > 01.Basics > Blink to open a sample blink app. If your board and port settings are correct, then you should be able to successfully upload this to your board and see a blinking LED. If you can’t get Blink to compile, upload, and run, then there’s no reason to continue these instructions yet. You need to diagnose and fix the problem before continuing. You cannot continue if you can’t compile and upload code into the Feather.
Sample Code
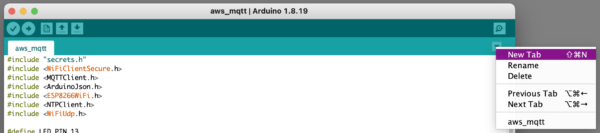
- Go to File > New to create a new Arduino sketch. If you still have the Blink example open, you can close it now.
- Save this empty sketch template to your Arduino projects folder. Give it a name like
aws_mqtt_test. - Copy/paste the following code into your sketch, replacing what’s already in there.
#include "secrets.h"
#include <WiFiClientSecure.h>
#include <MQTTClient.h>
#include <ArduinoJson.h>
#include <ESP8266WiFi.h>
#include <NTPClient.h>
#include <WiFiUdp.h>

WiFiClientSecure iot = WiFiClientSecure();
MQTTClient client = MQTTClient(256);

WiFiUDP ntpUDP;
NTPClient timeClient(ntpUDP, "north-america.pool.ntp.org"); // prep NTP server connectivity
X509List clientCertificate(AWS_CRT);
PrivateKey clientPrivateKey(AWS_PRIVATE);
X509List caCertificate(AWS_CA);

void connectToWiFi() // connect to local wifi network
{
  Serial.println("\nConnecting to Wi-Fi");

  //WiFi.mode(WIFI_STA);
  WiFi.begin((char *)WIFI_SSID, (char *)WIFI_PASSWORD);
  while (WiFi.status() != WL_CONNECTED) {
    delay(200);
    Serial.print("..");
  }

  Serial.println("\nSUCCESS: Connected to Wi-Fi");
  Serial.print("Wi-Fi SSID:  ");
  Serial.println(WIFI_SSID );

}

void messageReceived(String &topic, String &payload) {
  Serial.println("incoming: " + topic + " - " + payload);
  digitalWrite(LED_BUILTIN, LOW);
  delay(250);
  digitalWrite(LED_BUILTIN, HIGH);
  // Note: Do not use the client in the callback to publish, subscribe or
  // unsubscribe as it may cause deadlocks when other things arrive while
  // sending and receiving acknowledgments. Instead, change a global variable,
  // or push to a queue and handle it in the loop after calling `client.loop()`.
}

void connectToAWSIoT() // connect to AWS IoT
{
  Serial.print("\n\nConnecting to AWS IoT");

  iot.setClientRSACert(&clientCertificate, &clientPrivateKey);
  iot.setTrustAnchors(&caCertificate);

  client.begin(AWS_ENDPOINT, 8883, iot);

  while (!client.connect(AWS_THINGNAME)) {
    Serial.print(".");
    delay(200);
  }

  if (!client.connected()) {
    Serial.println("\nERROR: AWS IoT Connection Timeout");
    return;
  }

  client.subscribe(MQTT_SUB_TOPIC); // subscribe to MQTT topic
  client.onMessage(messageReceived);

  // display AWS IoT resource names in console
  Serial.println("\nSUCCESS: AWS IoT Endpoint Connected\n");
  Serial.print("\nAWS IoT Publish Topic:  ");
  Serial.println(MQTTT_PUB_TOPIC);
  Serial.print("\nAWS IoT Subscribe Topic:  ");
  Serial.println(MQTT_SUB_TOPIC);
  Serial.print("\nAWS IoT Thing Name:  ");
  Serial.println(AWS_THINGNAME);
  Serial.print("\nAWS IoT Endpoint:  ");
  Serial.println(AWS_ENDPOINT);
  Serial.println("\n");
}


void publishPayloadInternal() // format json payload then publish to MQTT topic
{
  StaticJsonDocument<200> doc;
  doc["time"] = timeClient.getEpochTime(); // get current NPT time/date in epoch format
  doc["heartbeat"] = 1;
  char jsonBuffer[512];

  serializeJson(doc, jsonBuffer);
  Serial.println(jsonBuffer);
  client.publish(MQTTT_PUB_TOPIC, jsonBuffer); // publish to MQTT topic
}

void publishPayload()
{
  static unsigned char delayCounter = 0;
  // This is called roughly every second. We'll send a heartbeat roughly every 10 seconds.
  if (delayCounter++ >= 10)
  {
    delayCounter = 0;
    publishPayloadInternal();
  }
}

// establish WiFi and AWS connectivity
void setup() {
  Serial.begin(115200);
  pinMode(LED_BUILTIN, OUTPUT);
  digitalWrite(LED_BUILTIN, LOW); // Light up during initialization.

  delay(2000); // some delay

  connectToWiFi();
  connectToAWSIoT();
  timeClient.begin();
  digitalWrite(LED_BUILTIN, HIGH); // Finished initialization.
}


void loop() {
  timeClient.update(); // get latest time from NTP server
  publishPayload(); // publish  payload to MQTT topic
  client.loop();
  delay(1000);

}
- Using the little down-arrow to the right of the tabs, select “New Tab.”
- Call it
secrets.h

- Copy in the following header.
#include <pgmspace.h>

// generated by the AWS IoT service
#define AWS_THINGNAME "feather"

// https://docs.aws.amazon.com/iot/latest/developerguide/topics.html
#define MQTTT_PUB_TOPIC "feather_heartbeat"
#define MQTT_SUB_TOPIC "feather_trigger"

const char WIFI_SSID[] = "MY_WIFI_NAME";
const char WIFI_PASSWORD[] = "WIFI_PASSWORD";
// This is just the server name, without the https:// prefix.
const char AWS_ENDPOINT[] = "xxxxxxxxxxxxxxxxxx.iot.us-west-2.amazonaws.com";


// Insert IoT Device Certificate generated by the AWS IoT service
static const char AWS_CRT[] PROGMEM = R"KEY(
-----BEGIN CERTIFICATE-----
(paste here)
-----END CERTIFICATE-----
)KEY";

// Insert IoT Device Private Key generated by the AWS IoT service
static const char AWS_PRIVATE[] PROGMEM = R"KEY(
-----BEGIN RSA PRIVATE KEY-----
(paste here)
-----END RSA PRIVATE KEY-----
)KEY";

// Insert Amazon Root CA 1
// https://docs.aws.amazon.com/iot/latest/developerguide/server-authentication.html#server-authentication-certs

static const char AWS_CA[] PROGMEM = R"EOF(
-----BEGIN CERTIFICATE-----
MIIDQTCCAimgAwIBAgITBmyfz5m/jAo54vB4ikPmljZbyjANBgkqhkiG9w0BAQsF
ADA5MQswCQYDVQQGEwJVUzEPMA0GA1UEChMGQW1hem9uMRkwFwYDVQQDExBBbWF6
b24gUm9vdCBDQSAxMB4XDTE1MDUyNjAwMDAwMFoXDTM4MDExNzAwMDAwMFowOTEL
MAkGA1UEBhMCVVMxDzANBgNVBAoTBkFtYXpvbjEZMBcGA1UEAxMQQW1hem9uIFJv
b3QgQ0EgMTCCASIwDQYJKoZIhvcNAQEBBQADggEPADCCAQoCggEBALJ4gHHKeNXj
ca9HgFB0fW7Y14h29Jlo91ghYPl0hAEvrAIthtOgQ3pOsqTQNroBvo3bSMgHFzZM
9O6II8c+6zf1tRn4SWiw3te5djgdYZ6k/oI2peVKVuRF4fn9tBb6dNqcmzU5L/qw
IFAGbHrQgLKm+a/sRxmPUDgH3KKHOVj4utWp+UhnMJbulHheb4mjUcAwhmahRWa6
VOujw5H5SNz/0egwLX0tdHA114gk957EWW67c4cX8jJGKLhD+rcdqsq08p8kDi1L
93FcXmn/6pUCyziKrlA4b9v7LWIbxcceVOF34GfID5yHI9Y/QCB/IIDEgEw+OyQm
jgSubJrIqg0CAwEAAaNCMEAwDwYDVR0TAQH/BAUwAwEB/zAOBgNVHQ8BAf8EBAMC
AYYwHQYDVR0OBBYEFIQYzIU07LwMlJQuCFmcx7IQTgoIMA0GCSqGSIb3DQEBCwUA
A4IBAQCY8jdaQZChGsV2USggNiMOruYou6r4lK5IpDB/G/wkjUu0yKGX9rbxenDI
U5PMCCjjmCXPI6T53iHTfIUJrU6adTrCC2qJeHZERxhlbI1Bjjt/msv0tadQ1wUs
N+gDS63pYaACbvXy8MWy7Vu33PqUXHeeE6V/Uq2V8viTO96LXFvKWlJbYK8U90vv
o/ufQJVtMVT8QtPHRh8jrdkPSHCa2XV4cdFyQzR1bldZwgJcJmApzyMZFo6IQ6XU
5MsI+yMRQ+hDKXJioaldXgjUkK642M4UwtBV8ob2xJNDd2ZhwLnoQdeXeGADbkpy
rqXRfboQnoZsG4q5WTP468SQvvG5
-----END CERTIFICATE-----
)EOF";
- Replace the information that’s custom to your network and IoT setup in the
secrets.hheader:- Enter your wifi information.
- If you named your thing something other than
feather, then replace that value. - Enter the AWS IoT endpoint and thing name that you used when setting up, above.
- Open your downloaded
*-certificate.pem.crtfile in a text editor and paste the certificate in the marked spot. - Open your downloaded
*-private.pem.keyfile in a text editor and paste the key in the marked spot. - You shouldn’t have to alter the Root CA, but it’s worth opening
AmazonRootCA1.pemin a text editor and verifying that it matches what’s already in the code.
Upload and Test
- Upload the Arduino sketch to your Feather board.
- Open up Tools > Serial Monitor and make sure the baud rate dropdown shows 115200.
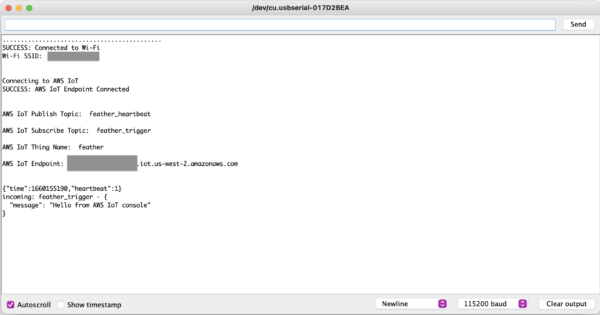
- You should start seeing messages about connecting to wifi and connecting to AWS IoT.
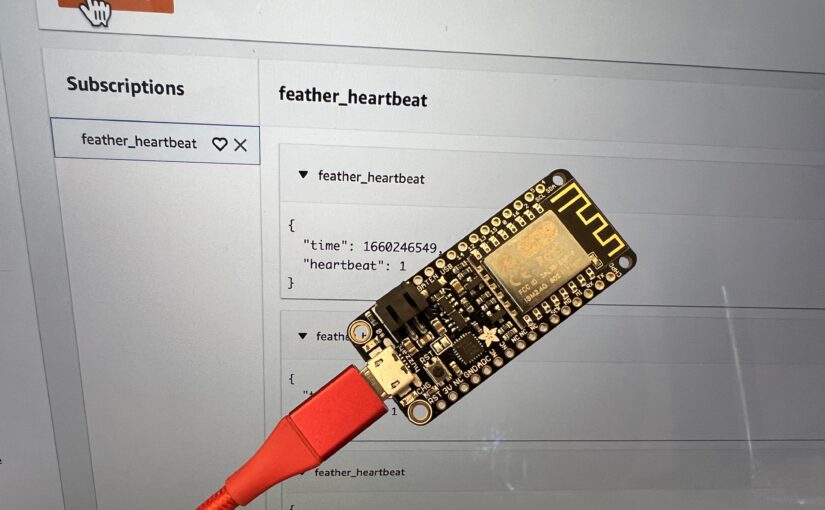
- Open up your AWS IoT Core console. Use the left-hand navigation to go to MQTT test client.
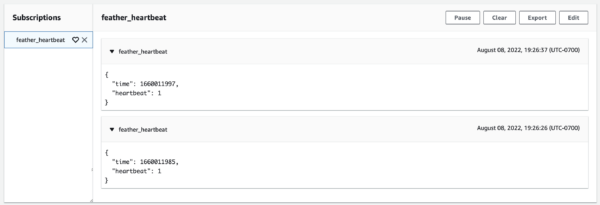
- Subscribe to
feather_heartbeat
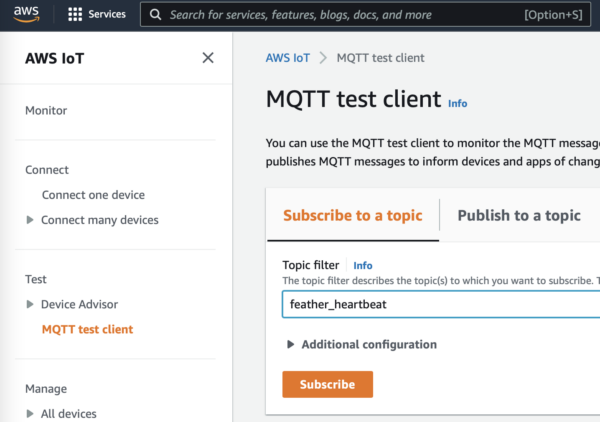
- About every ten seconds you should see a heartbeat.
- Go to the Publish to Topic tab.
- Set the topic name to
feather_triggerand click on the orange “Publish” button.
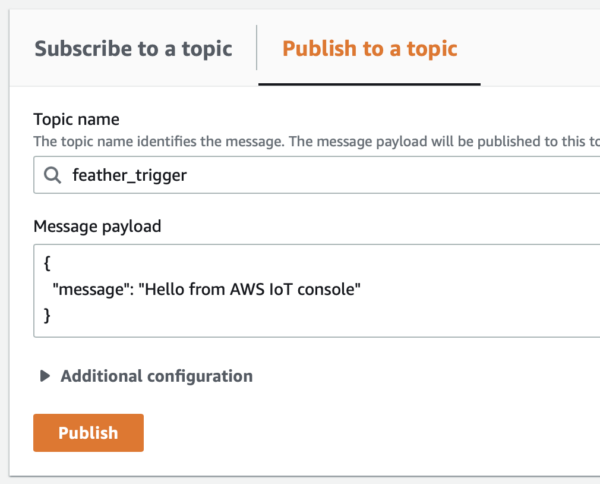
- You should see your message in the Arduino IDE serial console and the Feather LED13 should briefly blink red.
Congrats!
Congratulations! You now have the hardware, code, and infrastructure needed to do two-way MQTT on an Adafruit Feather Huzzah. You can now tweak the code or integrated pieces of it into your own projects.
2 thoughts on “Using the Adafruit Feather Huzzah With AWS IoT”