A few weeks ago I put together a RetroPie. A RetroPie is a small — smaller than a pack of cigarettes, smaller than a game controller — gaming system that emulates all of the classic consoles. There are no cartridges, only files on disk. There are disk images of each and every cartridge, with a built-in menu to choose which one to play. Play all of the games!
The system is based around the Raspberry Pi, an inexpensive and small single-board computer. A team in the UK designed them, partly inspired by the BBC Micro, a hackable and affordable computer from 1981. People my age got their start in computers and electronics by experimenting with such machines. Back then, computers were smaller, more simple, and usually had “expansion ports” specifically designed for this sort of thing. Computers and computer-like devices (phones, tablets) are expensive, exceptionally complex, and offer no easy way to wire up extra buttons, lights, dials, or mini displays. A group from Cambridge invented the Raspberry Pi to fill this gap. To give kids (and adults) an inexpensive computer that plugs into a TV and acts as a platform for experimenting with hardware and software. The base model is $35, but for any model you’ll need to bring your own TV, keyboard, mouse, and SD Card. It runs Linux (and a number of other things). You install the OS by downloading and copying a disk image to the SD card from a “normal” computer, then plugging it into the Raspberry Pi. If you make a mistake and screw something up with the Pi’s software or configuration, you can just copy a fresh image to the SD card and start again.
The RetroPie acts more as an appliance than a computer. It’s running Linux under the hood, and you need to do a couple of Linuxy things to initially set it up. Once it’s installed and configured to your liking, all you need is the RetroPie, a TV, and a game controller or two. The fact that it’s a computer simply drops away (except for a couple of interstitial “loading” screens that dump computer logs to the screen, visible when loading or exiting a game).
Bill of Materials: Hardware
You can build a RetroPie for between $50 and $80, depending on how elaborate you want to go. It’s less if you already have the right hardware lying around. Because I already had a Raspberry Pi and accessories, all I needed were the heatsinks, case, and controllers, so it was about $30 for me.
Raspberry Pi model B+ : $40
There are four variations of the Raspberry Pi: the model A, model B, model B+, and the Raspberry Pi 2. The 2 uses better hardware but, at the time of writing, isn’t yet supported by all drivers and packages. The model A is cheaper but has no network port. You’ll want the B or the B+, the main difference being 2 or 4 USB ports. Since the two B models are the same price, I’d suggest 4. That means up to 4 controllers. They are available from Adafruit, Sparkfun, and Amazon.
Heatsinks for overclocking : $5
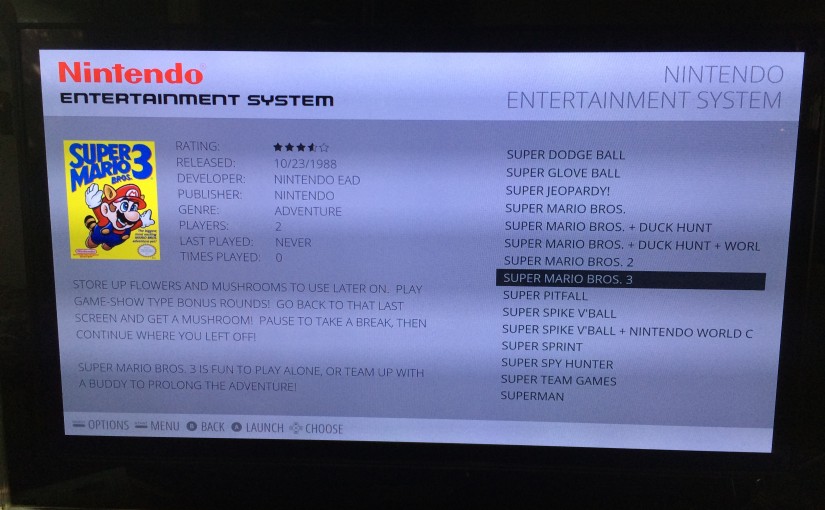
Heatsinks are not strictly necessary. Some games (notably Super Mario 3) run a little slowly on the stock Raspberry Pi. You can push the Raspberry Pi to its limits by enabling “overclocking” mode. This lets it run faster than normal, but it does so in a conservative fashion. Overclocking causes the chips to slowly heat up and heat can damage them. The Raspberry Pi overclocking mode monitors internal heat and scales down the speed if things get too hot, then back up as they cool off. Heatsinks let you sustain that overclocking by constantly cooling the chips. I got mine from Amazon, but they’re entirely optional.
Raspberry Pi case : $6
You don’t strictly need a case, but I decided to have one because I’m constantly transporting the RetroPie between home, work, and friends’ houses. There are a million cases available. I got the cheapest one I could find at Sparkfun.
Micro SD card : $10
This is the “hard drive” of the RetroPie. You probably don’t want anything less than 8GB. 64GB is overkill. I like the quality of and the extra adapters that come with the Kingston micro SD card. I went with a 16GB model from Amazon.
Controllers : about $10 each
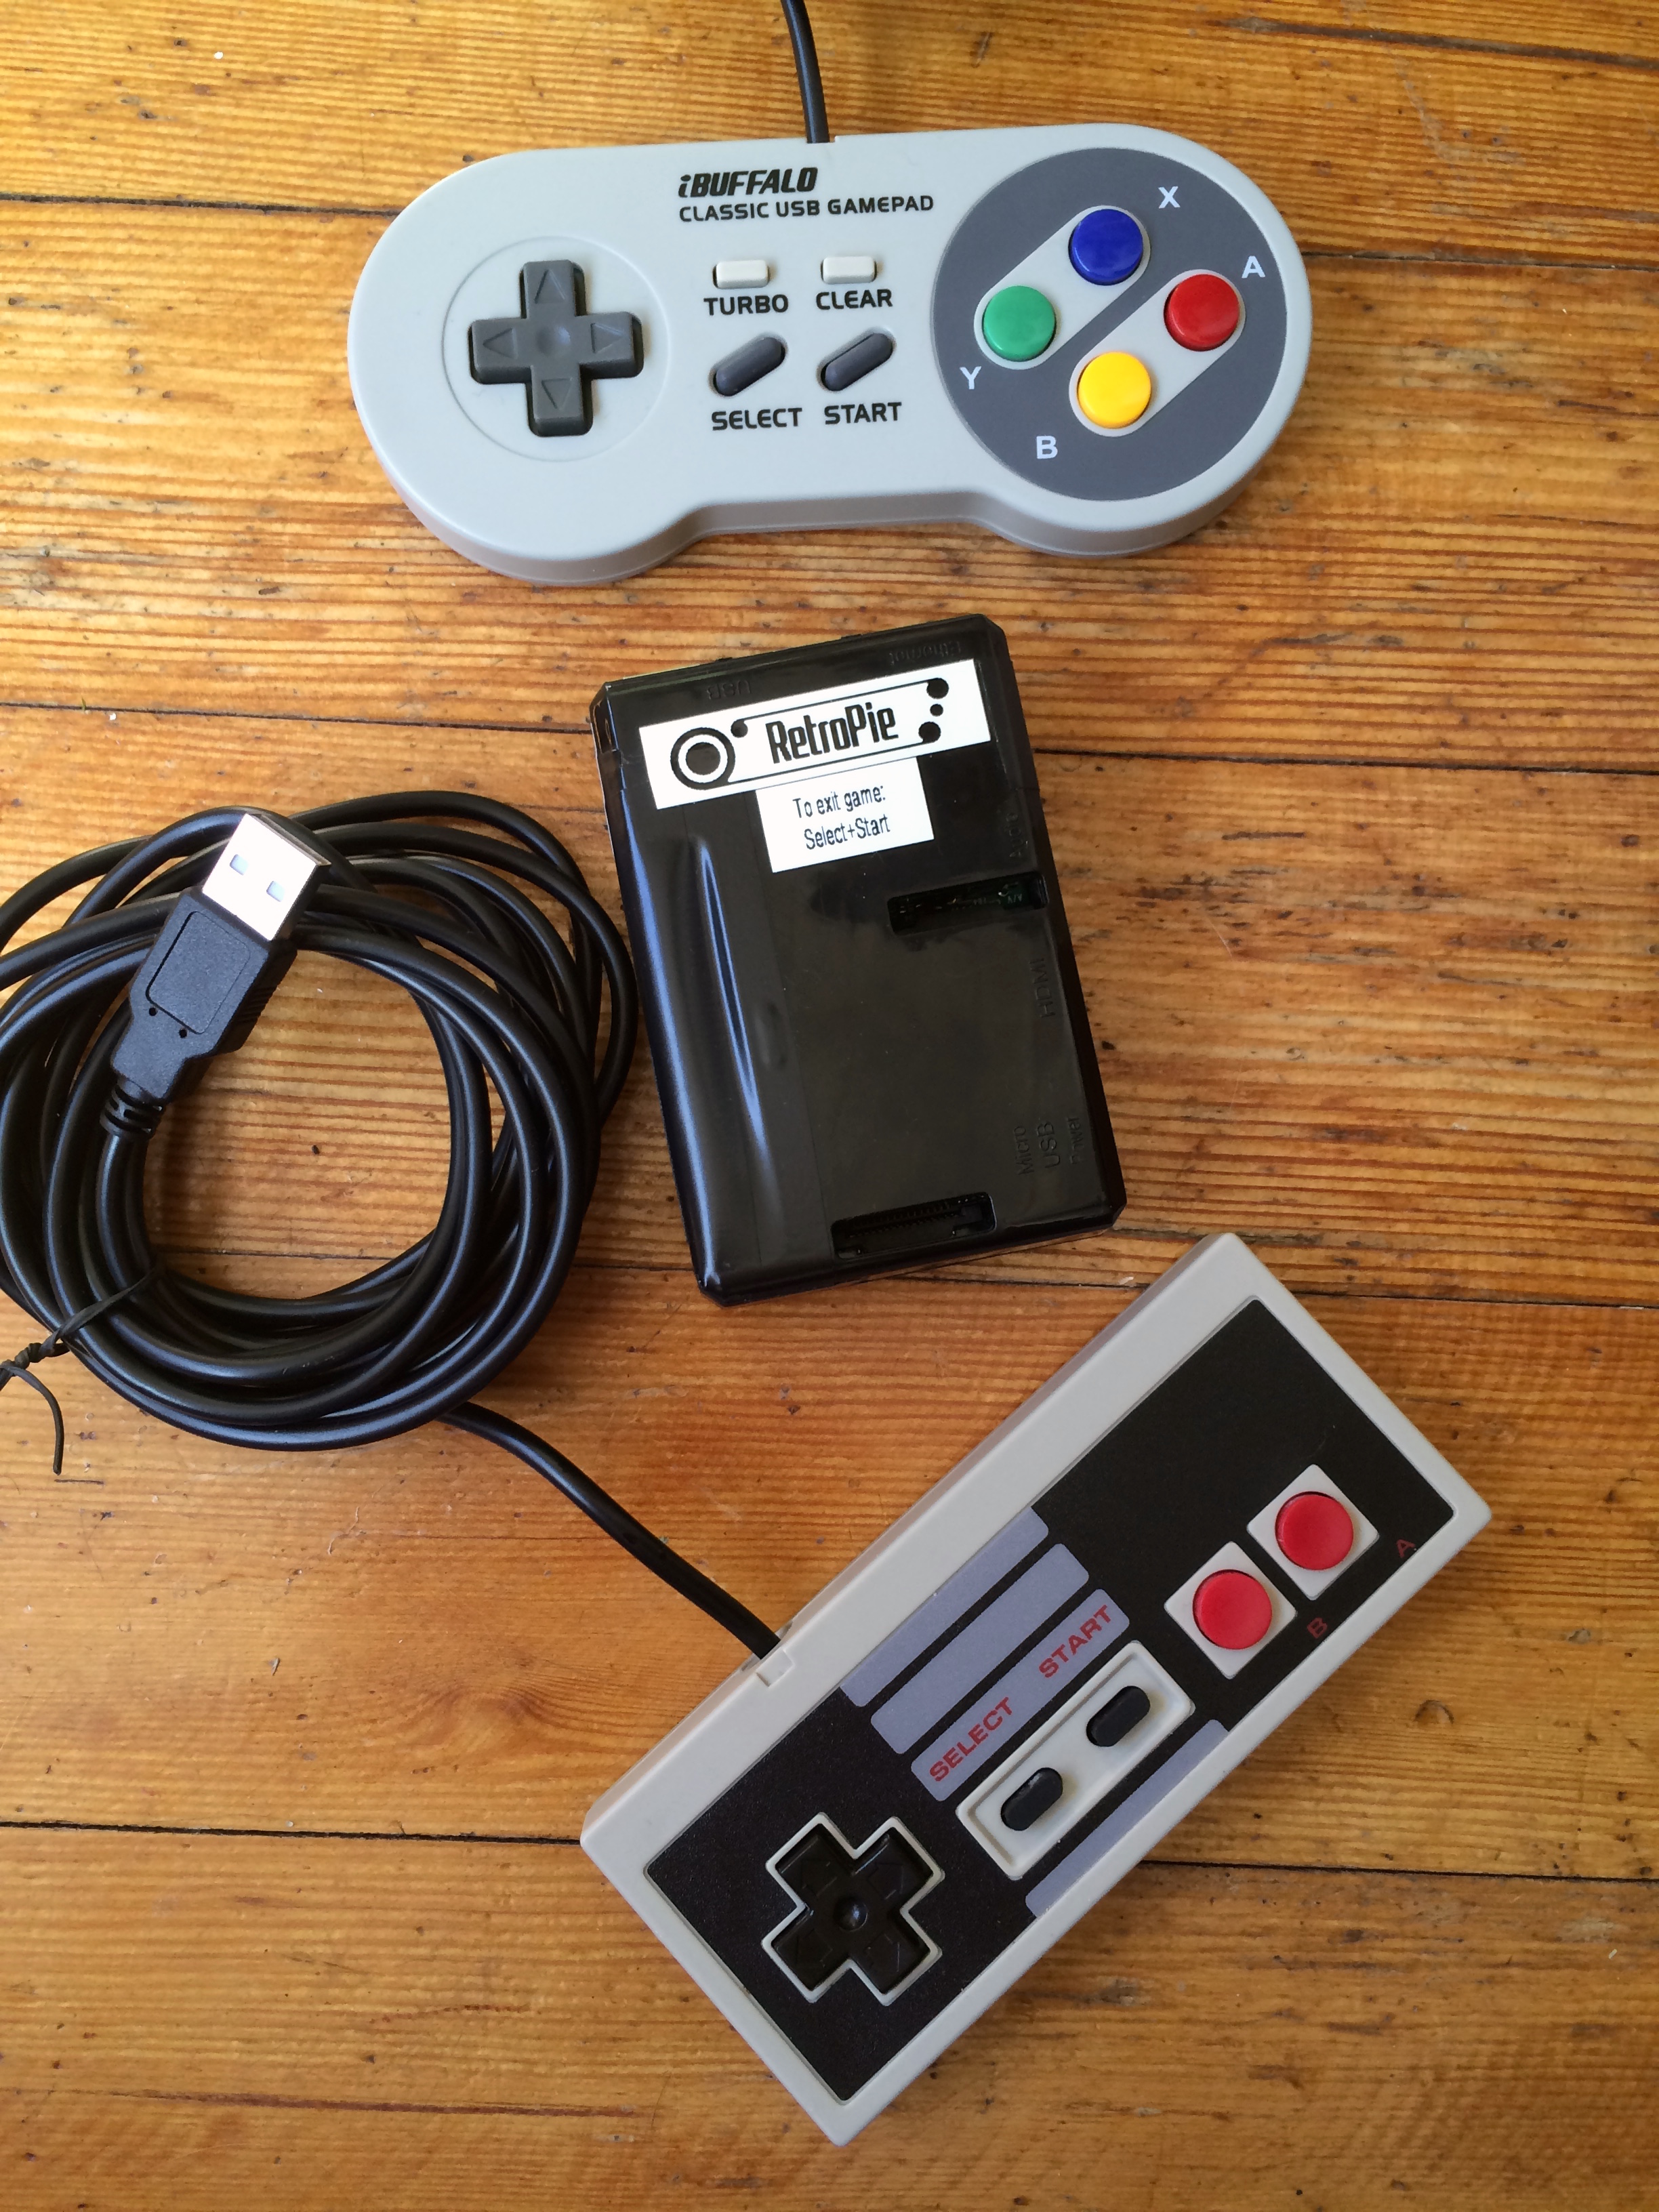
Controllers are a personal preference, but you’ll need to make sure they plug into USB. I got an NES controller ($9) and SNES controller ($12) from Amazon. If you really want the nostalgia of the NES controller, go for it. I found the button play to be a little off on mine. Pushing up would sometimes also unintentionally hit right or left. The SNES controller felt much more accurate. The SNES controller is also a bit more comfortable and is perfectly fine for playing regular NES games (you just have extra buttons that remain unused). Additionally, the two shoulder buttons act as page-up/page-down when scrolling through ROMs, a feature you don’t get with the NES controller.
USB Keyboard
You will need a USB keyboard for the initial setup, but then won’t ever need it again. You can borrow one from another computer in your household for the duration of the setup. Because I’ve been doing a lot of Raspberry Pi projects recently, I picked up a tiny wireless keyboard from Amazon for $25.
Micro USB cable and power adapter
I’m assuming you probably already have these at home. If not, order from Monoprice (cable, power brick) or Amazon.
On Sourcing Parts…
I’m usually hesitant to buy electronics parts from Amazon because it’s difficult to tell which specific manufacturer or vendor you’ll be dealing with. Because the same part listing on Amazon could go to any one of a number of vendors, quality can be inconsistent from order to order. And sometimes you get a counterfeit part or something totally different from what you ordered. With a single vendor, you get consistent results.
With that said, most of the “parts” in this project are fairly consistent even across vendors. All the vendors source from the same manufacturers. Plus, if you have Amazon Prime, the free shipping is convenient.
Bill of Materials: Software
- RetroPie Version 3.0, for Raspberry Pi 1 — Download the disk image for the Raspberry Pi 1, not 2.
- ROMs — You’re on your own for this one. Google can be helpful.
It might be useful to run the clrmamepro app against your ROMs. This will verify that (1) they are the correct ones and (2) that they are named correctly. Unfortunately, this is a Windows-only application and is an unfriendly command-line utility. Downloading, verifying, and naming ROMs is beyond the scope of this blog post.
Hardware Assembly
There’s not much to it:
- Attach the heat sinks to the two big chips on the Raspberry Pi.
- Put the Raspberry Pi in the case.
- Attach TV HDMI, keyboard, and network.
- Don’t yet attach power. It’s a body without a brain. You’ll want to write the SD card first.
Write the SD Card
You will want to plug in the SD card and clobber the partitions and filesystems on it with the RetroPie image file. eLinux has instructions for doing this on a variety of platforms. I do it on the Mac and am comfortable with using the command line. With the Mac, I believe there’s one “gotcha” that’s universal across all of the methods. You will want to unmount, but not eject, the SD card after plugging it in. That tells the computer you’re done with the filesystem on the card, but not the card itself.
Here’s how I do it. After plugging in the card, open a terminal window. Use the mount command to see what device number it’s using. In the case depicted below, I could see that plugging in the card caused the disk “BOOT” to show up in Finder. The mount command shows that it is mapped to disk 5 (/dev/disk5s1).

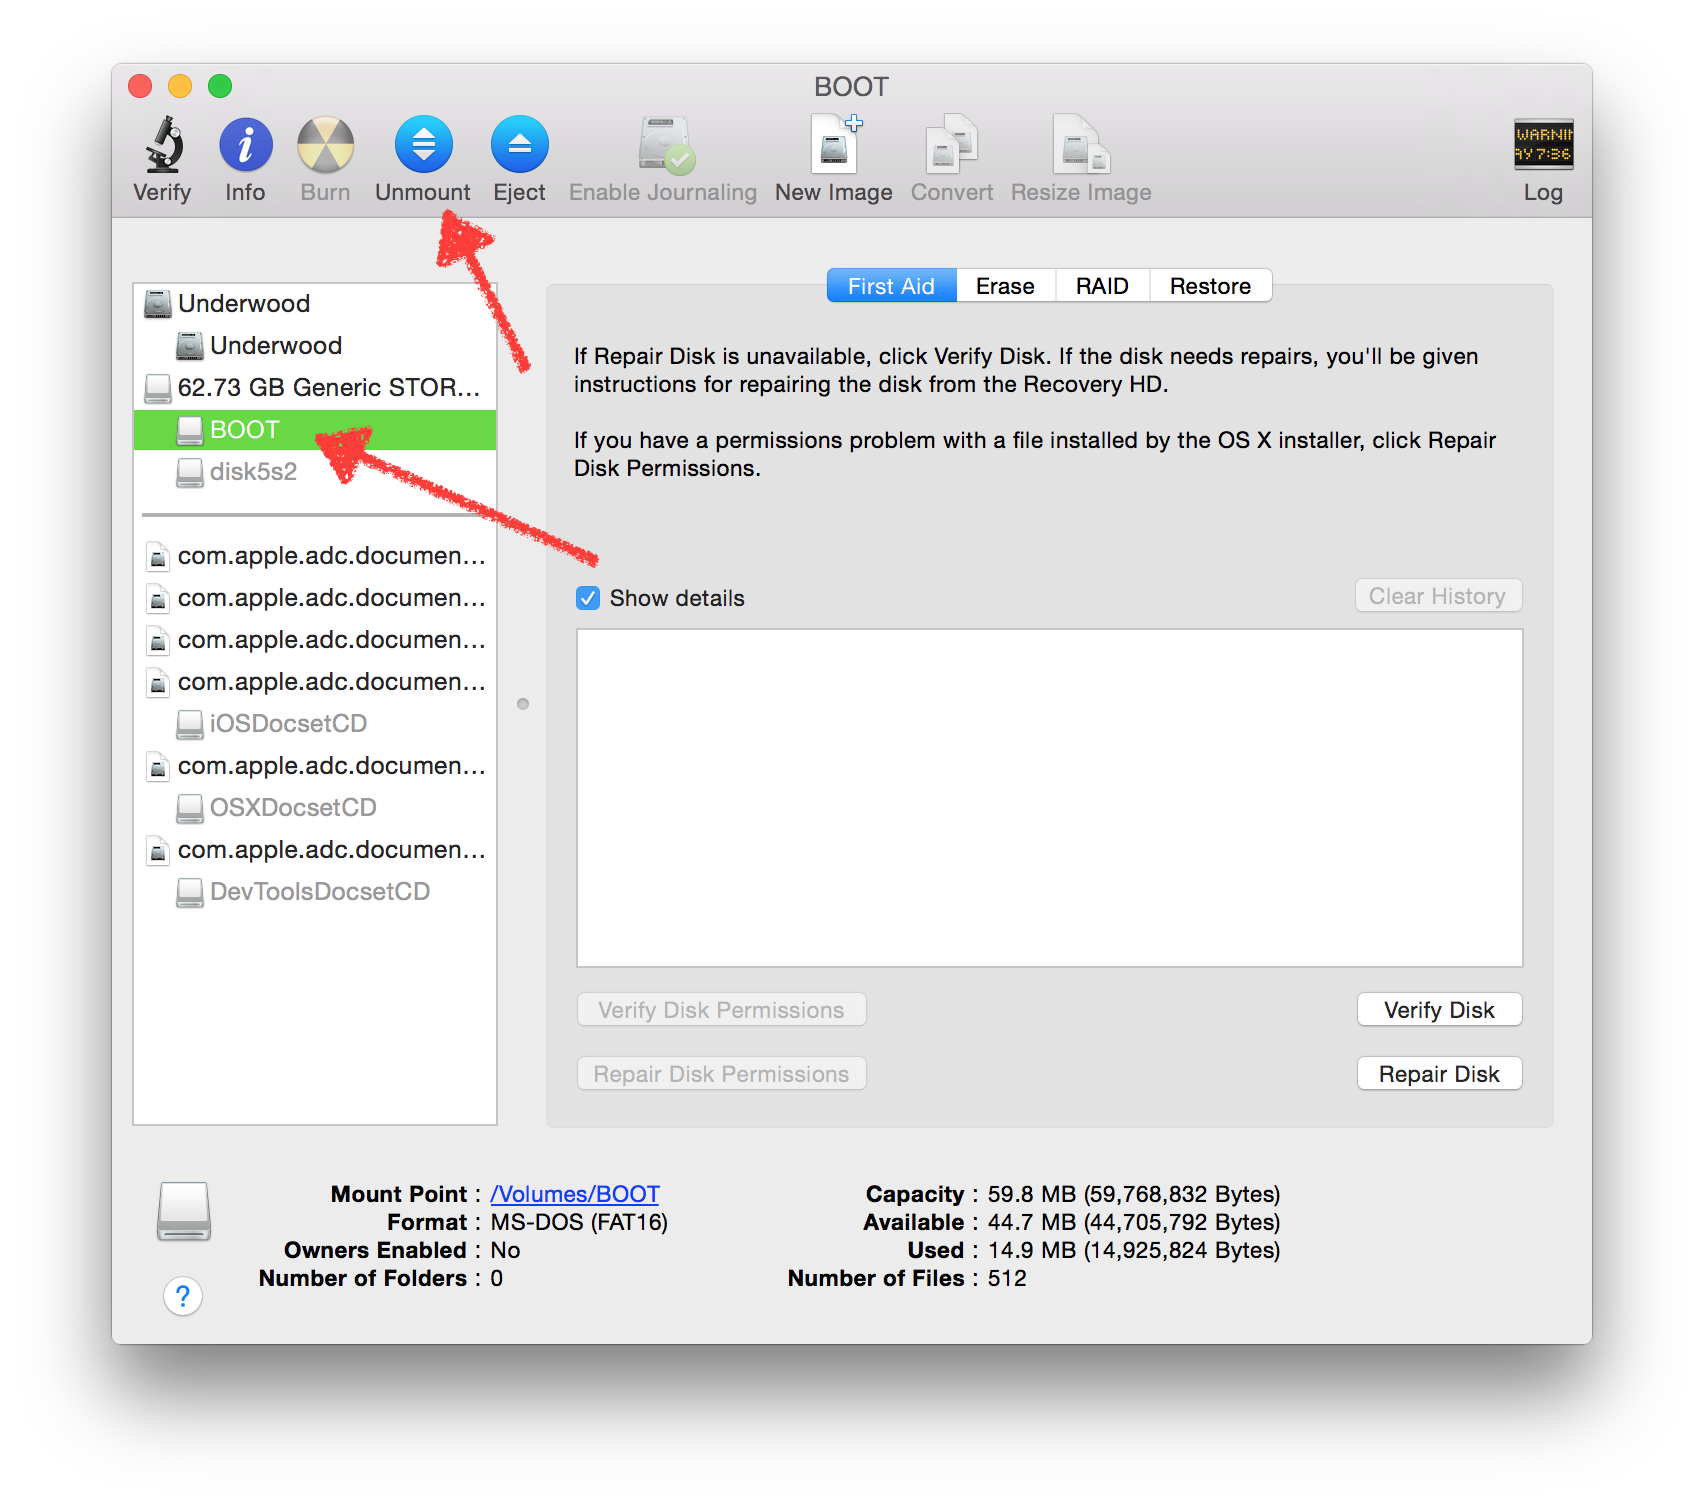
I then open up Disk Utility, select the SD card’s volume in the lefthand column, and choose “Unmount” (not Eject). The card stays listed, doesn’t disappear, but the volumes go gray because they’re no longer in use by the system. This unlocks them, letting us overwrite them.
Next, use your favorite tool to write the image file you downloaded to the SD card. I use the Unix command line tool dd, but GUI tools are available if you follow the eLinux link, above.
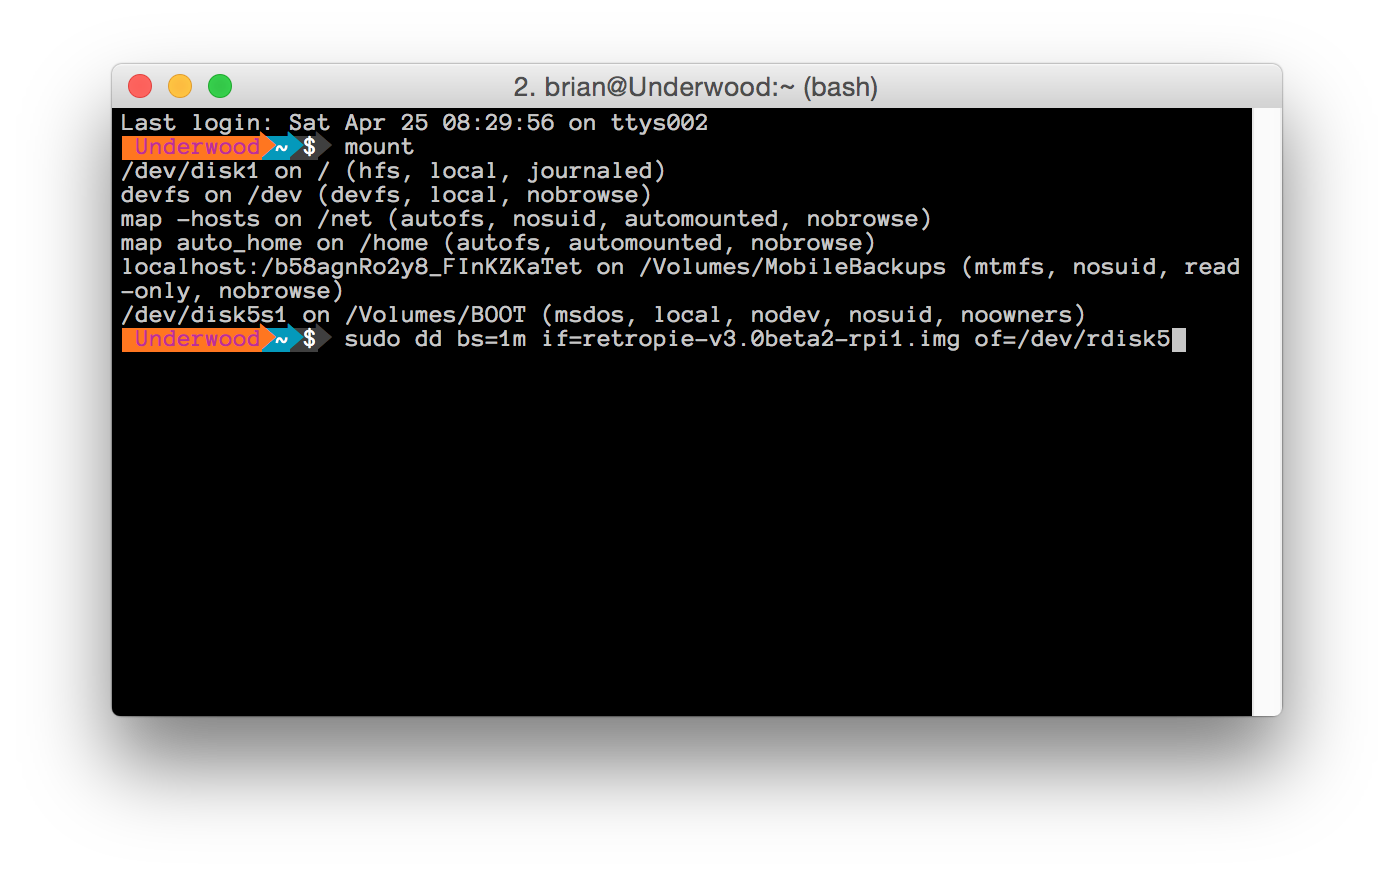
Note that I’m using the *.img filename (not *.img.gz one I downloaded — you have to decompress the file first). I’m also using /dev/rdisk5 as the destination instead of /dev/disk5. You can use either, but the “r” version is faster. R stands for “raw device.”
Finally, safely eject the SD card with Disk Utility. It now contains the base RetroPie operating system. You will need to do a little bit of initial configuration as well as copy the game ROMs to the Raspberry Pi.
First-Time Setup
Insert the SD card into your Raspberry Pi, turn on your TV, and connect the MicroUSB power cable to the Pi. It takes about a minute to boot. You’ll see some graphic splash screens and some scrolling Linux text. You will eventually arrive at a joystick configuration screen or the Emulation Station main menu. Hit F4 on your keyboard to exit, then press enter a few times to prevent it from relaunching the menu. At the login prompt, log in with the default username pi and password raspberry. This should leave you at a Linux prompt.
Run the command sudo raspi-config to get you into the setup menu. You will want to do configure the following things.
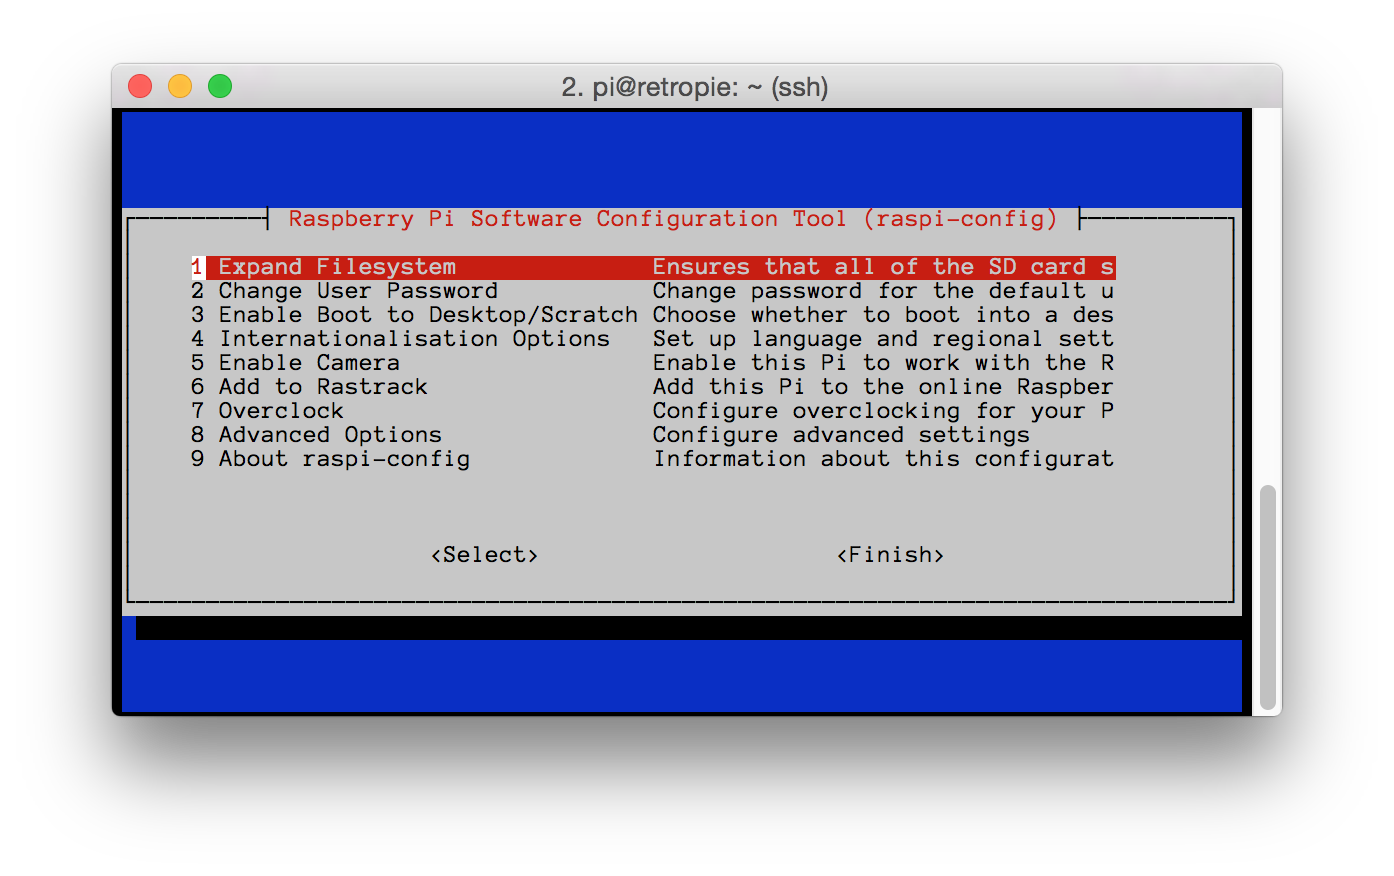
- Expand Filesystem — The RetroPie disk image is about 2GB in size. This means it will fit on SD cards 2GB and higher. Because of the way disk images are written to SD cards, it only uses the first 2GB of the card, leaving the rest of it as unallocated (and therefore unusable) space. This option expands the boundary of the filesystem, letting you use your full SD card as storage.
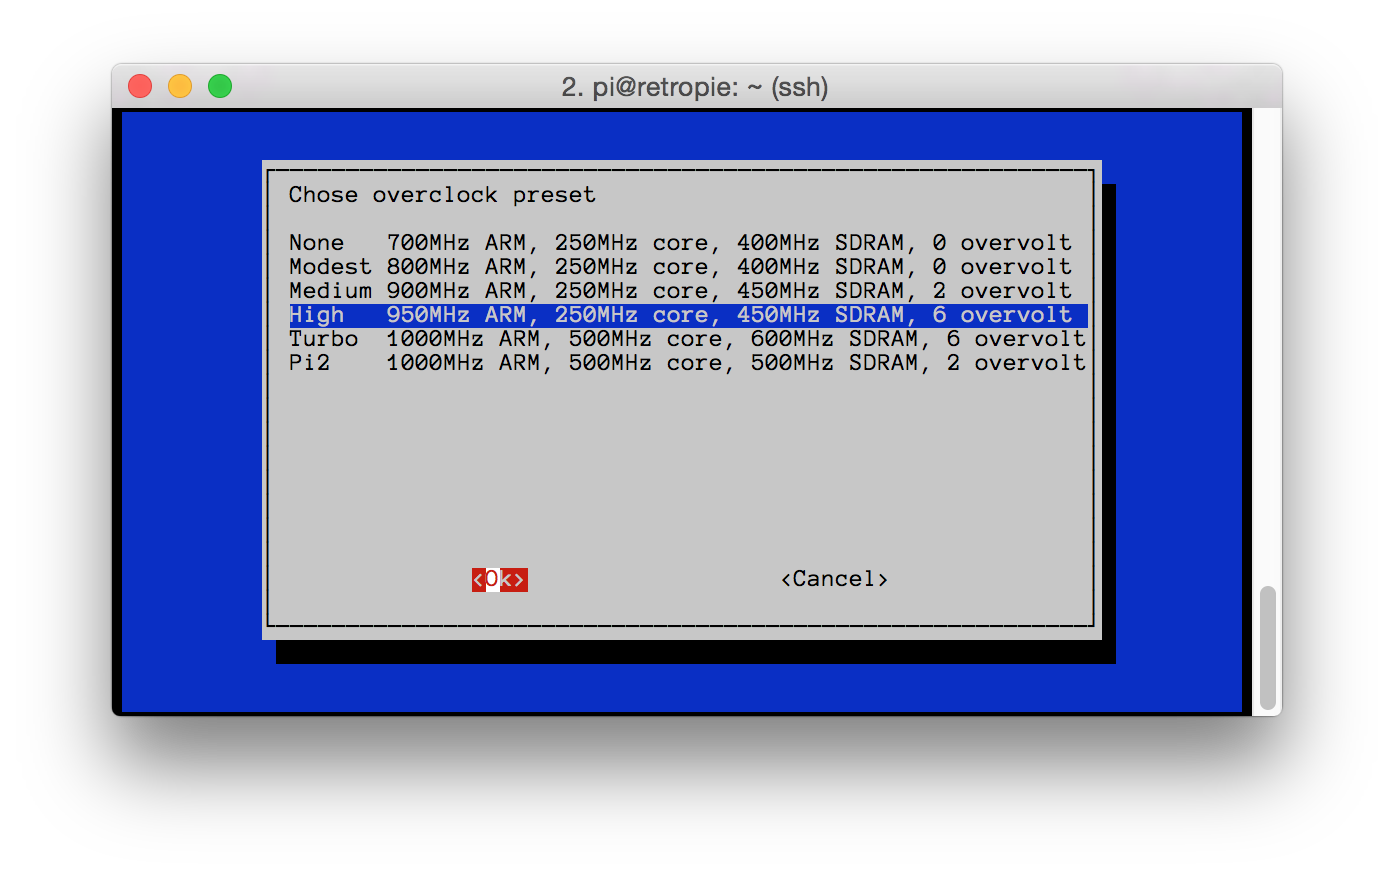
- Overclock > High — This tells the Raspberry Pi’s OS to bump up its clock speed from 700MHz to 950MHz when it is safe, temperature-wise, to do so.
- Advanced Options > Memory Split — The Model B+ Raspberry Pi has 512MB of memory, shared between the graphics and the main processor. Because the game system is going to be doing a lot of graphics work, bump this up to the max, 256. This gives you a 50/50 split between the OS and graphics.
- Advanced Options > SSH — Enable SSH. This is how we will get the ROMs onto the system.
It will ask you to reboot when complete. Tell it to reboot.
Once booted, do the F4-enter thing again and log in. Make a note of the IP address that’s displayed. We’re going to copy ROMs over the network to the Pi’s SD card from your regular desktop or laptop. I’m a command-line person, but if you prefer a GUI, you can use something like Panic Software’s Transmit or WinSCP. From the OS X command line, I do something like the following (but substituting in the actual path to the ROMs and the actual IP address of your Raspberry Pi):
cd ~/Downloads/path/to/NES/ROMs/
scp * pi@10.0.1.25:RetroPie/roms/nes/
cd ~/Downloads/path/to/SNES/ROMs/
scp * pi@10.0.1.25:RetroPie/roms/snes/
Remember: regardless of which client you use to scp files to the RetroPie, the username is pi and the password is raspberry.
When the ROMs are copied, return to the RetroPie connected to the TV and run the command sudo reboot, which will reboot it back into the menu.
Note that there are plenty of other ROMs and applications available, including a few built-in ones. This guide only covers NES and SNES. Beware that many of the built-in ones (such as Doom) require a mouse and keyboard.
Using the RetroPie
The first time you run RetroPie, it will detect your first gamepad and ask you to calibrate it. It lists off the buttons, one by one — Up, Down, Left, Right, A, B, Select, Start, Left-Shoulder, and Right-Shoulder — asking you to push the appropriate button on your controller. If your controller does not have the corresponding button (for example the shoulder buttons on a classic NES gamepad), just hold down any other button for 5 seconds. You’ll see it count down and say “skipped.”
The RetroPie boots to a system select menu. Use left/right to choose a system such as NES or SNES. The ‘A’ button acts as a selection key and the ‘B’ button acts as escape. Explore the menus. Both Select and Start hold their own menus. The system menu (Start) lets you “scrape” metadata about your ROMs (box art, description), adjust sound, configure additional controllers, perform other tweaks, and cleanly shut down the system. The option menu (Select) lets you jump around and resort the game listing, as well as edit information about the selected game.
Hit ‘A’ to start a game. Hit ‘Select’ and ‘Start’ at the same time, while in a game, to exit and return to the menu.
Calibrate your TV
Modern televisions do a lot of digital signal processing on the video and audio to “enhance” the picture for you: deinterlacing, color enhancement, motion enhancement, and so on. Each of these steps adds dozens to hundreds of milliseconds of lag to the video. This is ordinarily fine when your source is a TV show or movie. When it’s something more interactive, like a video game, these “enhancements” cut into your reaction time. 250 milliseconds is a quarter of a second. 500 is half a second. Now imagine how bad a platformer would be to play if all of your jumps were a half-second late.
If your TV has a “game mode” you’ll want to enable it for the input the RetroPie is plugged into. Similarly, you’ll want to disable all of the enhancements. They have names like Vivid Color, Color Remaster, Motion Interpolation, Brilliance Enhancer, Black Extension, C.A.T.S., and AGC. Turn them all off.
Have Fun!
Have fun and enjoy your RetroPie. In an upcoming post, I plan to show you how to save system state. Because the games are running in an emulator, and because emulators are just virtual machines, you can take a snapshot of the entire system at any point in time. This effectively gives you a save point that is completely outside the game itself. It means that you can, for instance, snapshot the game console at the end of each Megaman screen, not just at the in-game save points. If you screw up a screen, just rewind to the previous one. Many of the old games were of a brutal difficulty; this gives you a leg up if your hand/eye coordination isn’t the best.
2 thoughts on “Building a RetroPie console emulator”