If you scroll back a month, you will find my article entitled The Universal Catapult for Seej. It talks about a small toy catapult I designed and printed for a tabletop war game. You would not know it because there is no mention of other versions, but it is entirely focused on the 3rd revision of the catapult. I thought it would be interesting to walk you through the first two versions.

The above photo shows the evolution from v01 through v03. You will note that one thing that stays fairly consistent across versions are the rubberband winding keys, but before printing even began, they went through a couple of revisions on paper.

The first tension winding key design was a little more artistic. It consisted of a round peg and two “wings” that would mate with corresponding holes. I generally liked the look, but wasn’t happy with how the rubber band would attach — presumably around the center peg, then wrapping and/or tangling around the wings. I also didn’t like the way the wings would have to be offset due to the nature of printing — everything has to print on a flat table. Before going too far with this design, I temporarily shelved it to explore alternatives.

The key design I went with looks almost exactly like the final version. The peg itself is a little different — conical instead of a “T” shape, again due to printing and gravity — but the essential DNA of the design is all there. It’s a rectangular peg for locking with a cylindrical peg for pivoting and a place to attach the rubberband.

The v01 variant of the catapult was almost entirely a solid block. The base and sides are one piece. How do you get the swing arm in there? My original swing arm design was a little more complex and asymmetric. One peg had a built in retainer and the other had a snap-on retainer ring. In theory, you’d get one in, then the other, then attach the ring. In practice, I never built one and worry a bit that the angle at which you would have to insert it would be impossible to achieve. I ended up going with a simpler symmetric design without fiddly snap-on pieces.

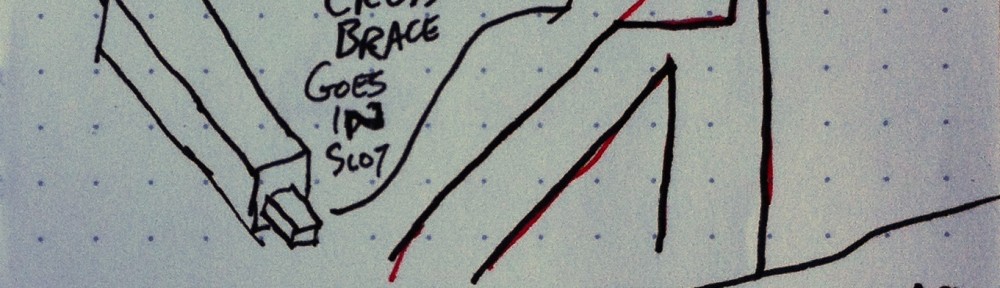
The other big problem with the v01 design was that because the base and sides were all one piece, there were some thermal printing issues. The base was a little thin, so sometimes curled up. I also now try to avoid having large monolithic designs because if a problem in printing does not manifest itself until close to the end, you might have wasted an hour or two of print time. Small designs. Quick printable snap-together pieces. This is my mantra. You will also note that I did not have a clear handle on what the cross-brace situation would look like. Given the strike angle of the swing arm, had I continued down this path, the cross-brace might have gone flying.
The second version attempted to break the design into modular pieces. The base became two skids with struts to attach and properly space them. The sides became detachable triangles.

I really liked the direction that this version was going. I liked the hex holes, the hex strut, and the little nubbins on the hex strut that prevented it from pushing all the way through. I felt that either the base was too thin or the hex was too thick. There was really only a layer or two of print on either side of the hex hole. I decided that the correct thing to do was to shrink the hex strut rather than thicken the skid.
The resulting product is the v03 design, which you can download from Thingiverse. I removed the “this is a work in progress flag” now that my printer is working and I am able to confirm everything fits together to acceptable tolerances.

I like your sketches.
Thanks, Bob. Ever since getting the MakerBot, I have done my best to pretend I am a mechanical engineer. 🙂