If you’re going to do something, do it big. Make it spectacular. Whether it’s a fantastic success, an amazing effort, or an astounding failure, make it something people will talk about for a long time.
A couple of weeks ago the office in which I work did a bit of a reshuffle. We ran out of cubicle space, so more cubes were ordered and the existing ones were laid out in a different way. I have been in a private office, with a door, for about five years but we were similarly running short on offices. Since I am just an engineer and technically do not need an office — I do not hire people, fire people, or talk to vendors — I moved out to cubeland. I decided that if I were to move from office to cube, I should make it big.
In the past, I have heard of people doing grandiose things to their cubicles. You sometimes see pictures and read stories (like jwz’s cube at Netscape, the luxury cubicle and various and sundry “steampunk” cubicle makeovers). Maybe someone you work with has a friend who knew a guy whose coworker did something fun to their cubicle. In all my life as an office drone, I have not personally known a single person who did something big to their cubicle. So I figured I would be that person.
My plan was to do something a little bit stylish and a little bit formal. Some of the steampunk-themed cubicles I have seen pictures of online were a bit over the top. I needed something a little more subdued, more neo-Victorian, less look-how-freaky-I-am. I also have a lot of equipment that I work with, with tools and gear littering the desk, so the spartan desktop was not an option. Covering the desk surface in shelf paper — such as marble-print paper to make it look like a marble desk — was not going to fly for this reason, either. I decided to focus mainly on the walls and window.
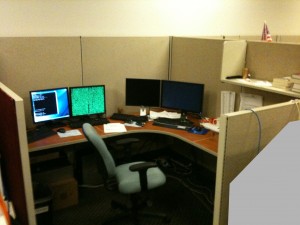
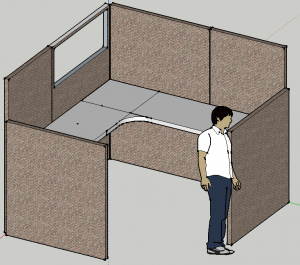
The first step was to take some accurate measurements and mock-up the cubicle design in Sketchup. This took a little longer than I expected because I ended up re-learning Sketchup in the process, but resulted in something I could use for scribbling on and visually calculating and cataloging surface areas (because I was not sure I wanted to cover the entire surface). The following photo is not of my cube, but of a neighbor’s. I forgot to take a “before” picture.
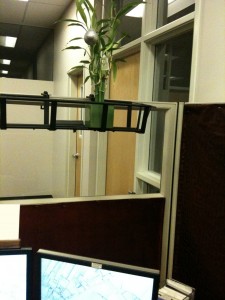
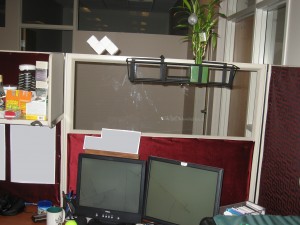
I started with a small flower box for the “window.” This got my plant off of the desk and out of the shadow of the shelves — closer to the light, fluorescent or otherwise. This was an easy trip to Home Depot for a basic wrought iron model. The next step was to decide which pieces of beige office fabric to cover with more fancy upholstery. After a little thought, I concluded the two back walls, down to the desk surface and the inside of the two side wing-like walls. Anything below the desktop would be a bit of a waste — nobody would see down there, and I wanted to keep it clear for cables and feet. The outside surfaces of the two wing walls technically did not belong to me, they belonged to the two neighboring cubes. So basically my plan was to cover all the visible inside surfaces of the cube. If I had to stare at a wall all day, I at least wanted it to be an interesting wall.
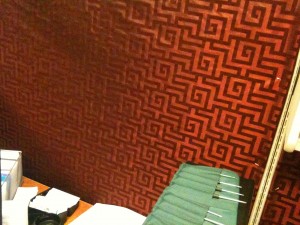
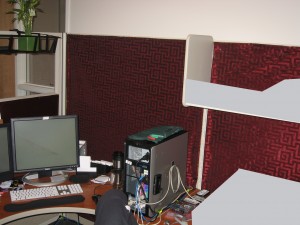
At this point, I enlisted the help of Kim — and what a great help she was in this endeavor. Since she works with fabric all the time, she knew the hookups for good deals on quality upholstery fabric. She also helped pick out the colors and styles. My original thought was to do velvet with a distressed pattern, or perhaps something more tapestry-like with a damask or brocade. With Kim’s expert design and style advice, what I ended up with is a flocked velvet (like Victorian wallpaper) for the main surface, and a more plush velvet for the rest of the cubicle.
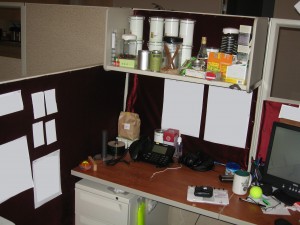
I stayed late one night and cut and affixed the upholstery fabric over the cubical wall fabric, using T-pins to attach it. Overall, I think it came out pretty darn well. When viewing the following pictures, keep in mind that both styles of fabric are a deep red, but show up as a very dark red, almost black, due to lighting.
One embellishment I considered, but then decided against was to give the velvet that “overstuffed” look — some padding behind it, then use buttons (likely buttons on the heads of T-pins) to pin it down in regular intervals. I really like this look in furniture, but decided it might look a little too “padded room” for the cube.
The next step is to find a good mirror. When someone comes up behind me, even when I am not wearing headphones, I do not always notice they are there. They are out of my field of view and some of my equipment can be noisy. One coworker has a little rear-view mirror attached to the corner of his monitor. Another has a regular mirror on a stand. I thought I might do something similar, but with a more elegant mirror hung from the wall — hanging it with clear fishing-line style wire from a coat hook at the top of the cube wall. This would mimic how pictures are hung in some galleries and older homes, by that same wire, but from crown moldings. I am also considering something similar with wall sconces.
Now I feel that I have done a big change to my cubicle. It is something that makes me happy and proud. I hope it is something that my coworkers can carry on into the future and be able to say firsthand “yeah, I worked with this guy who did this cool thing to his cube…” In fact, I hope it opens up the door for them to do something interesting and unusual with their cubes straight away.
